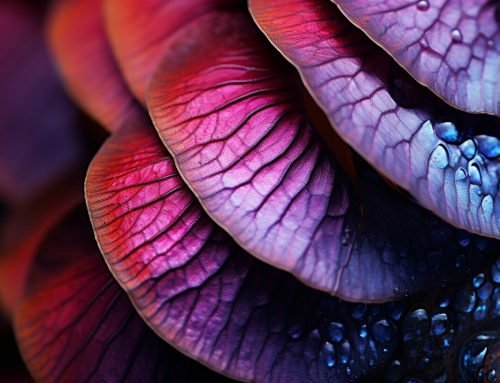
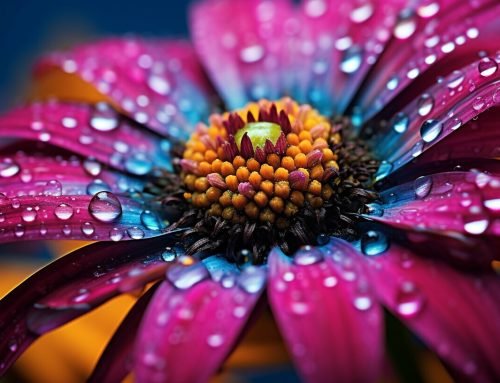
Macro photography requires precise camera settings to capture detail and achieve stunning close-up images. By understanding and adjusting camera settings, photographers can enhance their macro photography skills and produce impressive results. In this section, we will explore the importance of camera settings in macro photography and how they can be adjusted for optimal results.
Key Takeaways:
- Adjusting camera settings is crucial for mastering macro photography
- Recommended camera modes for macro photography depend on lighting conditions
- Avoid using the macro or close-up scene modes on cameras
- Controlling aperture is essential to manipulate depth of field in macro photography
- Using flash can help achieve sufficient depth of field in high magnification macro photography
Understanding Camera Modes for Macro Photography
When venturing into macro photography, understanding the proper camera modes to use can significantly impact the quality of your images. As macro photography involves capturing intricate details and small subjects up close, it is essential to choose the appropriate camera mode that allows you to have full control over your settings and achieve the desired results.
The macro or close-up scene modes found on many cameras may seem like the obvious choice, but it’s important to note that these modes often limit your ability to adjust crucial settings. Instead, opt for manual mode or aperture priority mode, depending on your lighting conditions.
| Camera Mode | Lighting Conditions | Suitable Settings |
|---|---|---|
| Aperture Priority Mode | Natural light | Adjustable aperture, auto ISO |
| Manual Mode | Flash or tripod use | Adjustable aperture, shutter speed, ISO |
In aperture priority mode, you can set the desired aperture to control the depth of field in your macro shots. This allows you to blur or emphasize specific elements in your composition, adding creative versatility to your images. In manual mode, you have full control over the aperture, shutter speed, and ISO, providing flexibility for different lighting situations, especially when using flash or a tripod.
By understanding and utilizing the appropriate camera modes for macro photography, you can take full control of your settings and capture stunning close-up images with precision and clarity.
Adjusting Aperture for Macro Photography
Achieving the desired depth of field is crucial in macro photography, and understanding how aperture affects it is essential. The aperture, represented by the f-number, controls the amount of light entering the lens and determines how much of the scene will be in sharp focus. For macro photography, a shallow depth of field is often preferred to create a dreamy, blurred background and draw attention to the main subject.
When adjusting the aperture for macro photography, it’s important to consider the following factors:
- Light Source: The available light plays a significant role in determining the optimal aperture setting. In bright conditions, using a smaller aperture (larger f-number) like f/16 or f/22 can help in capturing more details. On the other hand, in low-light situations, a wider aperture (smaller f-number) like f/2.8 or f/4 is recommended to allow more light into the camera.
- Camera Sensor Size: The size of your camera’s sensor affects the depth of field. Cameras with larger sensors tend to have shallower depth of field at the same aperture value compared to cameras with smaller sensors. So, if you’re using a full-frame camera, you may need to use a smaller aperture to achieve the desired depth of field.
- Focusing Distance: The distance between the camera and the subject also influences the depth of field. As you get closer to the subject, the depth of field becomes shallower. To compensate for this, using a smaller aperture is recommended to increase the zone of sharp focus.
The Optimal Aperture Range for Macro Photography
Depending on the factors mentioned above, the optimal aperture range for macro photography typically falls between f/8 and f/16. This range allows for a good balance between depth of field and image sharpness, ensuring that the subject is in focus while still maintaining a pleasing background blur. However, it’s important to experiment and adjust the aperture according to the specific requirements of each macro photography situation.
| Aperture | Depth of Field | Effect on Image |
|---|---|---|
| f/2.8 | Shallow | Dreamy, blurred background |
| f/8 | Moderate | Subject in focus, slight background blur |
| f/16 | Deep | Subject and background in sharp focus |
By understanding how aperture affects depth of field and considering the lighting conditions, camera sensor size, and focusing distance, photographers can effectively adjust the aperture settings for macro photography and achieve stunning close-up images with the desired level of sharpness and background blur.
Using Flash in Macro Photography
Using flash in macro photography is crucial for capturing sharp and well-exposed images, and understanding the proper camera settings can make a significant difference. When it comes to flash settings, it is recommended to use automatic flash mode with manual aperture setting, enabling photographers to control the depth of field and achieve the desired level of sharpness.
The choice of aperture in macro photography is essential for controlling the depth of field, which determines how much of the subject will be in focus. A smaller aperture (larger f-number) will result in a larger depth of field, meaning more of the subject will be in focus. On the other hand, a larger aperture (smaller f-number) will create a shallow depth of field, making the subject stand out against a blurred background.
When using flash in macro photography, it is important to consider the use of a tripod or other means of support to ensure camera stability. This is particularly crucial when working with higher magnifications, as any slight movement can result in blurred images. Additionally, using focusing tools such as focus assist magnification or focus peaking can greatly aid in achieving precise focus.
| Camera Setting | Recommended Value |
|---|---|
| Aperture | Manual mode, adjust for desired depth of field |
| Flash Mode | Automatic mode |
| ISO | Dependent on available light, lower ISOs preferred with flash |
| Shutter Speed | Fast enough to prevent motion blur without flash |
| White Balance | Select appropriate setting based on lighting conditions |
| Focus | Combination of continuous autofocus and manual focus techniques |
By applying these camera settings and techniques, photographers can enhance their macro photography skills and capture stunning close-up images. Remember to experiment with different settings and practice regularly to master the art of using flash in macro photography.
Mastering Focusing Techniques in Macro Photography
Focusing correctly can be a challenge in macro photography, but with the right techniques and camera settings, you can capture stunningly sharp close-up shots. When shooting close-ups, precision in focusing is crucial to bring out the intricate details of your subject. Here, we will explore some effective focusing techniques to help you achieve optimal results.
Combining Continuous Autofocus and Manual Focus
One technique that works well in macro photography is combining continuous autofocus with manual focus. Continuous autofocus allows your camera to continuously adjust the focus as you compose your shot, keeping your subject sharp. However, in certain situations, manual focus may be necessary, especially when dealing with very small or delicate subjects. By using manual focus, you have full control over the exact area you want to focus on, ensuring maximum sharpness.
Pro Tip: To assist with manual focus, many cameras offer features like focus assist magnification or focus peaking. These tools provide visual cues, such as highlighted edges or zoomed-in views, making it easier to achieve precise focus.
Adjusting Depth of Field with Aperture
Another important aspect to consider when focusing in macro photography is the depth of field. Depth of field refers to the zone of sharpness in your image, ranging from the nearest point to the farthest point in focus. By adjusting your aperture, you can control the depth of field and determine how much of your subject will be in focus.
| Aperture Setting | Depth of Field |
|---|---|
| Wide (small f-number) | Shallow depth of field, perfect for isolating a specific detail |
| Narrow (large f-number) | Greater depth of field, ideal for capturing more of the subject in focus |
Pro Tip: The optimal aperture setting depends on various factors such as the size of your subject, the distance between your camera and the subject, and the available light. Experiment with different aperture values to find the right balance between sharpness and background blur.
Utilizing Focusing Tools and Techniques
In addition to autofocus and manual focus, there are other focusing tools and techniques that can enhance your macro photography. Focus stacking is a technique where multiple images are taken at different focus distances and blended together to create a final image with increased depth of field. This is particularly useful when capturing macro subjects with intricate details throughout the frame. Additionally, utilizing a tripod or other camera support can help eliminate camera shake and ensure stability, resulting in sharper images.
Pro Tip: Remember to take advantage of features like Live View for exposure preview, burst mode for increased focusing accuracy, and the self-timer to reduce camera shake. These small adjustments can greatly improve the sharpness and overall quality of your macro shots.
By mastering focusing techniques and understanding how camera settings impact focus in macro photography, you can elevate your close-up photography skills to new heights. Experiment with different techniques, explore the possibilities of your camera’s focusing capabilities, and most importantly, enjoy the process of capturing stunning macro shots.
Additional Camera Settings and Tips for Macro Photography
Beyond the essential camera settings, there are additional techniques and tips that can elevate your macro photography to the next level. These techniques focus on enhancing your ability to capture stunning close-up images by fine-tuning your camera settings and utilizing various tools and tricks.
Firstly, shooting in RAW format allows for greater flexibility in post-processing, enabling you to make adjustments to exposure, white balance, and other settings without compromising image quality. This is especially important in macro photography, where small details and delicate colors may require careful adjustments.
Another important consideration is white balance. By selecting the appropriate white balance setting, you can ensure accurate color reproduction in your macro shots. Different lighting conditions may require different white balance settings, so make sure to experiment and find the most suitable option for your specific environment.
In addition to camera settings, stability is crucial for capturing sharp macro photos. Investing in a tripod or other support system can greatly improve stability and reduce the risk of camera shake. This is especially important when shooting at high magnification, where even the slightest movement can result in blurry images.
Recommended Camera Settings for Macro Photography:
| Camera Setting | Recommended Value/Option |
|---|---|
| Aperture | Adjust according to desired depth of field |
| ISO | Low ISO in flash photography, higher ISO in low light situations |
| Shutter Speed | Fast enough to prevent motion blur |
| Focus Mode | Combination of continuous autofocus and manual focus techniques |
Other useful tips for macro photography include utilizing Live View for exposure preview, as it allows you to see the impact of different settings in real-time. Additionally, using burst mode can increase focusing accuracy, especially when you need to capture a moving subject or when working with limited depth of field.
Finally, the use of the self-timer function can minimize camera shake caused by pressing the shutter button. This is particularly useful when shooting without a tripod or in situations where you need to position yourself close to the subject.
By implementing these additional camera settings and tips, you can take your macro photography to new heights, capturing intricate details and breathtaking close-up shots.
Conclusion
By understanding and adjusting camera settings for macro photography, you can unlock your artistic prowess and capture the captivating micro-world like never before. Mastering macro photography requires a deep understanding of how camera settings affect the final image, and in this article, we have explored the essential camera settings and techniques to help you achieve stunning close-up images.
When it comes to camera modes, it is important to avoid using the macro or close-up scene modes on your camera, as they may limit your creative control. Instead, opt for aperture priority mode for natural light situations and manual mode when using flash or a tripod.
Adjusting the aperture is crucial in macro photography as it allows you to control the depth of field, determining how much of your subject is in focus. The optimal aperture range depends on various factors such as the light source, camera sensor size, and focusing distance. Experimenting with different apertures will help you achieve the desired effect in your macro photos.
Using flash is essential to ensure sufficient depth of field in high magnification macro photography. It is recommended to use automatic flash mode with manual aperture setting for the best results. Additionally, consider adjusting the shutter speed to prevent motion blur when shooting without flash. The ISO value should also be adjusted depending on the availability of light, with lower ISOs preferred when using a flash and higher ISOs necessary in low light situations without a flash.
Focusing in macro photography can be challenging, but a combination of continuous autofocus and manual focus techniques can help you achieve precise focus. Utilize focusing tools such as focus assist magnification or focus peaking, which can be found in many modern cameras, to enhance your focusing accuracy.
Other important camera settings to consider include shooting in RAW format for flexibility in post-processing, selecting the appropriate white balance to ensure accurate color reproduction, and using tripods or other supports to maintain camera stability. Saving your preferred camera settings will also save you time and allow for quick access during your macro photography sessions.
By applying these camera settings and techniques, you will be able to elevate your macro photography skills and capture breathtaking close-up images that reveal the intricate details of the micro-world. So grab your camera, fine-tune those settings, and let your creativity soar!
FAQ
What are the recommended camera modes for macro photography?
Aperture priority mode is suitable for natural light conditions, while manual mode is necessary for flash or tripod use. Avoid using the macro or close-up scene modes on cameras.
How do I adjust the aperture for macro photography?
Adjusting the aperture is crucial for controlling depth of field in macro photography. The optimal aperture range depends on factors such as light source, camera sensor size, and focusing distance.
Why is using a flash important in macro photography?
Using a flash is essential for achieving sufficient depth of field in high magnification macro photography. It is recommended to use automatic flash mode with manual aperture setting.
What should the shutter speed be for macro photography?
Shutter speed is not critical when using a flash but needs to be fast enough to prevent motion blur when shooting without flash.
How does ISO value affect macro photography?
The ISO value is dependent on the availability of light. Lower ISOs are preferred when using a flash, while higher ISOs are necessary in low light situations without a flash.
What techniques can I use for focusing in macro photography?
Focusing in macro photography can be challenging. A combination of continuous autofocus and manual focus techniques is recommended, along with using focusing tools such as focus assist magnification or focus peaking.
What other camera settings are important for macro photography?
Other important camera settings include shooting in RAW format for flexibility in post-processing, selecting the appropriate white balance, ensuring camera stability through the use of tripods or other support, and saving camera settings for quick access.
Are there any additional tips for macro photography?
Yes, additional tips include using Live View for exposure preview, using burst mode to increase focusing accuracy, and utilizing the self-timer to reduce camera shake.