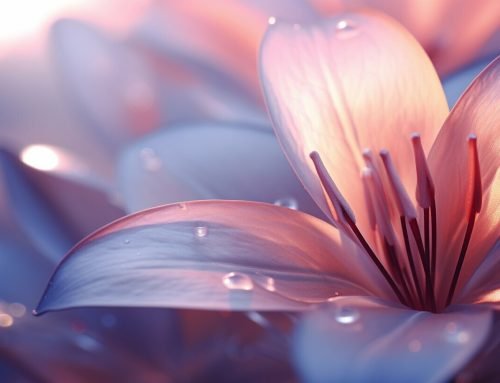
Macro photography techniques, known as micro and close-up photography, allow you to capture larger-than-life images of small subjects. It’s a fascinating world that reveals intricate details often overlooked by the naked eye. Whether a beginner or an experienced photographer, macro photography offers a unique perspective that can take your photography skills to the next level.
Key Takeaways:
- Macro photography is the art of capturing close-up images of small subjects, producing larger-than-life-size pictures.
- Macro photography can be accessible to beginners using the macro mode on point-and-shoot cameras or by exploring additional options on DSLR cameras.
- Investing in a dedicated macro lens can significantly enhance your macro photography, allowing for 1:1 magnification and capturing intricate details.
- Lighting and composition are crucial in macro photography, and experimenting with different techniques and settings is essential to achieve stunning results.
- Overcoming challenges such as depth of field, lighting, and achieving sharp focus requires understanding the fundamentals and employing the right techniques.
Getting Started with Macro Photography
Ways to explore macro photography shoot camera or a DSLR: there are various ways to explore macro photography and unleash your creativity. Macro photography allows you to capture the intricate details of small subjects, turning them into larger-than-life images. To get started, here are some tips on equipment and settings for beginners.
If you have a point-and-shoot camera, you can quickly try macro photography by using the macro mode. This mode adjusts the lens for close focusing, allowing you to capture stunning macro and close-up photographs without additional equipment.
For DSLR users, there are additional options to enhance your macro photography. One technique is to reverse the lens you already have, such as a 50mm prime lens. By removing the lens and turning it around, you can achieve magnification and create outstanding macro images.
Another option is to use two lenses, with one of them reversed, to create a powerful macro setup. This technique requires a coupling ring to join the lenses together.
Extension tubes are also useful for macro photography with a DSLR. These hollow cylindrical spacers increase the lens extension, allowing you to get closer to the subject and capture minute details.
Close-up filters are affordable accessories that can be screwed onto the front of your lens. They shorten the lens’ minimum focusing distance, allowing you to take sharp pictures of close objects. Keep in mind that close-up filters have limitations in terms of depth of field and image quality.
Investing in a dedicated macro lens is recommended for those who are serious about macro photography. These lenses can achieve 1:1 magnification and focus from infinity to the closest focus setting, capturing intricate details in stunning clarity.
With the right equipment and techniques, macro photography can open up a world of possibilities for capturing the beauty of small subjects. Experiment with different settings, lighting, and compositions to create visually striking macro images that showcase the intricate details that often go unnoticed.
Enhancing Your Macro Photography with Dedicated Macro Lenses
A dedicated macro lens can take your images to the next level if you’re serious about macro photography. These specialized lenses are designed to provide exceptional magnification and focus capabilities, allowing you to capture intricate details that are not easily visible to the naked eye. With their ability to achieve 1:1 magnification, dedicated macro lenses bring your subjects to life on the camera’s sensor.
One of the key advantages of using a dedicated macro lens is the ability to focus from infinity to the closest setting. This allows you to explore a vast range of subjects, from tiny insects to delicate flowers, with unparalleled precision. The versatility of a macro lens provides endless possibilities for creative compositions and unique perspectives.
In addition to their magnification capabilities, dedicated macro lenses are also known for their exceptional optical quality. These lenses are designed to minimize distortion and aberrations, resulting in sharp and detailed images. The advanced optics of a dedicated macro lens ensure that every tiny detail of your subject is captured with utmost clarity, creating stunning close-up photographs.
| Benefits of Dedicated Macro Lenses |
|---|
| 1. 1:1 magnification for lifelike images |
| 2. Focus from infinity to closest setting |
| 3. Exceptional optical quality for sharp and detailed images |
| 4. Versatility for capturing a wide range of subjects |
When choosing a dedicated macro lens, consider the focal length that best suits your needs. Shorter focal lengths, such as 50mm or 60mm, are ideal for shooting small subjects at close range, while longer focal lengths, such as 100mm or 150mm, provide a greater working distance, allowing you to capture subjects from a distance without disturbing them.
Investing in a dedicated macro lens is a decision that can greatly enhance your macro photography. With their exceptional magnification, focus capabilities, and optical quality, these lenses open up a world of possibilities for capturing the intricate details of small subjects. Whether you’re an aspiring macro photographer or an experienced enthusiast, a dedicated macro lens is an essential tool in your photography kit.
Mastering Lighting and Composition in Macro Photography
Lighting and composition play a vital role in capturing stunning macro photographs that showcase the intricate details of your subjects. When it comes to lighting, understanding how to use natural and artificial light effectively can make a significant difference in the outcome of your images.
One technique to consider is using diffusers to soften harsh light and reduce shadows. Diffusers can be made from materials such as white fabric or translucent plastic and can help create a more even and flattering light on your subject. Conversely, Reflectors can be used to bounce light onto your subject, filling in shadows and adding dimension to your images.
Experimenting with the size and angle of the subject about the light source can also dramatically affect your macro images. Changing the angle of light hitting your issue can reveal different textures and details while varying the distance between your subject and the light source can create interesting shadows and highlights.
Composition is another crucial aspect of macro photography. Consider the rule of thirds, dividing your frame into a grid of nine equal parts and placing your subject along the lines or at the intersections. This creates a visually appealing composition that draws the viewer’s eye to the topic. Additionally, try different perspectives and angles, such as shooting from above or below, to add unique and intriguing elements to your photographs.
| Lighting Tips | Composition Tips |
|---|---|
| – Use diffusers to soften harsh light – Experiment with reflectors to add dimension – Change the angle of light for different textures – Vary the distance between the subject and the light source | – Follow the rule of thirds – Try different perspectives and angles – Shoot from above |
Quote:
Creating visually appealing macro photographs requires a combination of lighting and composition techniques. By experimenting with different lighting setups and exploring unique perspectives, you can capture stunning images that highlight the intricate details of your subjects.
In conclusion, mastering lighting and composition in macro photography is crucial to create visually stunning images. Experiment with different lighting techniques, such as diffusers and reflectors, and consider the angle and distance of the light source in relation to your subject. When it comes to composition, follow the rule of thirds and explore different perspectives and angles to add depth and interest to your images. You can elevate your macro photography skills and capture breathtaking close-up shots with practice and experimentation.
Overcoming Challenges in Macro Photography
As a beginner in macro photography, you may encounter challenges related to depth of field and lighting. Still, with the right techniques, you can overcome them and capture impressive close-up shots.
Depth of field is the area in an image that appears acceptably sharp. In macro photography, the depth of field is very shallow due to the close distance between the camera and the subject. To control depth of field, you can use smaller apertures, such as f/16 or f/22, which increase the area of sharpness. However, smaller apertures also reduce the amount of light entering the camera, so you may need to compensate by using longer shutter speeds or artificial lighting.
Another technique to achieve a greater depth of field is focus stacking. Focus stacking involves taking multiple images of the same subject at different focus distances and then combining them in post-processing. This technique allows you to create a final image with a larger area of sharpness, ensuring that all the intricate details of your subject are in focus.
Lighting is another challenge in macro photography. When shooting close-up subjects, it’s important to consider the angle, intensity, and direction of light to create visually appealing images. Natural light can provide beautiful results, but it can also be unpredictable. In situations where natural light is not sufficient or controllable, you can use artificial lighting sources, such as LED lights or external flashes, to illuminate your subject. Manipulating the position and intensity of artificial lights can help you achieve the desired lighting effect and highlight the details of your subject.
| Challenges | Techniques |
|---|---|
| Shallow Depth of Field | – Use smaller apertures (e.g., f/16 or f/22) – Try focus stacking for increased sharpness |
| Lighting Challenges | – Utilize natural light effectively – Experiment with artificial lighting sources |
Overcoming the challenges in macro photography requires practice, patience, and experimentation. By understanding the concepts of depth of field and lighting, and applying the appropriate techniques, you can capture stunning macro images that showcase the intricate details of your subjects.
Achieving Sharp Focus in Macro Photography
Achieving sharp focus is crucial in macro photography, and understanding the depth of field and choosing the right aperture are key to capturing stunning close-up images. Depth of field refers to the area in your image that appears in sharp focus while the rest of the image appears blurry. In macro photography, the depth of field is very shallow due to the close proximity to the subject. To increase the depth of field and ensure more of your subject is in focus, you need to use smaller apertures.
Using smaller apertures, such as f/16 or higher, allows more of the subject to be in focus. However, it’s important to note that smaller apertures also reduce the light entering the camera, leading to longer exposure times. To compensate for this, you may need a tripod or other stabilization methods to keep your camera steady during longer exposures.
Another technique to achieve sharp focus in macro photography is focus stacking. Focus stacking involves taking multiple images of the same subject, each with a slightly different focal point, and then merging them in post-processing to create a final image with greater depth of field. This technique is particularly useful when photographing complex subjects with varying depths, such as flowers or insects.
When choosing the right aperture and focal point, consider the desired effect you want to achieve in your macro photograph. A wide aperture, such as f/2.8, creates a shallow depth of field and can isolate a specific part of your subject, drawing attention to its intricate details. On the other hand, a smaller aperture, such as f/16, creates a larger depth of field and is ideal for capturing the entire subject in sharp focus.
| Aperture | Depth of Field | Example |
|---|---|---|
| f/2.8 | Shallow | Isolating a flower petal |
| f/16 | Large | Capturing an entire flower |
Creative Techniques and Perspectives in Macro Photography
Macro photography offers endless creative possibilities, and by exploring unique techniques and perspectives, you can capture extraordinary images of small subjects. Whether you’re a beginner or an experienced photographer, you can take several creative approaches to enhance your macro photography.
One technique to consider is using manual focus for precise focusing. In macro photography, depth of field is often very shallow, so manually adjusting the focus allows you to pinpoint the exact area you want to highlight. By taking your time and carefully adjusting the focus, you can capture stunning details in your macro shots.
Another way to add creativity to your macro photography is by experimenting with different angles and perspectives. Instead of always shooting from eye level, try getting down low or shooting from unusual angles. This can provide a fresh perspective and create visually interesting compositions. Don’t be afraid to get close and fill the frame with your subject, emphasizing its intricate details.
Natural light can also play a significant role in macro photography. By utilizing the available light, you can enhance the mood and emphasize the details of your subject. Please pay attention to the direction and quality of the light, as well as any shadows or highlights it creates. Using diffusers or reflectors can help control the light and create a more pleasing effect.
| Techniques | Benefits |
|---|---|
| Manual focus | Precise focusing on specific details |
| Experimenting with angles and perspectives | Creating unique and visually interesting compositions |
| Utilizing natural light | Enhancing mood and emphasizing subject details |
To create visually appealing macro photographs, composition is key. Consider the rule of thirds, leading lines, and negative space to create balance and draw the viewer’s eye to your subject. Don’t be afraid to break the rules and experiment with different compositions. Remember, macro photography’s beauty lies in capturing the intricate details of small subjects, so focus on creating visually compelling images.
Tip: Experimenting with focus stacking
Focus stacking is a technique that involves taking multiple images of a subject at different focus points and blending them in post-processing. This ensures that the entire subject is in sharp focus, even when shooting at wide apertures with shallow depth of field. To achieve focus stacking, use a tripod to keep your camera steady and adjust the focus slightly for each shot. In post-processing, use Adobe Photoshop or Helicon Focus software to align and blend the images. This technique is beneficial when capturing macro shots with intricate details.
“Photography is an art of observation. It’s about finding something interesting in an ordinary place… I’ve found it has little to do with the things you see and everything to do with the way you see them.” – Elliott Erwitt
With the right techniques and creative mindset, macro photography opens up possibilities. Don’t be afraid to explore different approaches, experiment with unique perspectives, and capture the beauty of small subjects in a compelling and visually stunning way. Whether you’re capturing the delicate petals of a flower or the intricate textures of a bug, macro photography allows you to showcase the hidden details that often go unnoticed.
Conclusion
Macro photography is a fascinating field that allows you to capture remarkable details of small subjects. With the right techniques and equipment, anyone can excel in this specialized form of photography.
To succeed in macro photography, it is essential to have a good understanding of the basics. This includes capturing images at a magnification ratio of 1:1 or greater, where the subject appears life-size or larger on the camera’s sensor. Lighting and composition play a significant role in macro photography, and experimenting with different techniques and settings is necessary to find what works best for you.
Having the right gear is also important. All essential tools are a camera with manual controls, a lens capable of close focusing, a tripod for stability, and a remote shutter release to reduce camera shake. Additionally, diffusers, reflectors, extension tubes, and close-up filters can enhance your macro photography and help you capture stunning images.
Challenges in macro photography, such as depth of field and lighting, can be overcome with the right techniques. By using smaller apertures, you can control the depth of field and achieve optimum sharpness. Focus stacking can also combine multiple images and create an overall sharp image. Additionally, diffusers, reflectors, and careful positioning of artificial lights can help you overcome lighting challenges and bring out the best in your macro subjects.
Finally, don’t forget to explore new creative techniques and perspectives in macro photography. Experiment with manual focus for precise focusing, try unique angles and perspectives, and harness the power of natural light to create visually appealing images. With dedication and practice, you can master macro photography and capture truly stunning and unique photographs of small subjects.
FAQ
Can macro photography be done without any additional equipment?
Yes, macro photography can be done using the macro mode on a point-and-shoot camera, which allows for close focusing and capturing great macro and close-up photographs.
What options are available to enhance macro photography with a DSLR camera?
Several options include reversing the lens you already have for magnification, using two lenses with one reversed for a powerful macro setup, using extension tubes to get closer to the subject, and using close-up filters that shorten the lens’ minimum focusing distance.
Is it recommended to invest in a dedicated macro lens?
Yes, investing in a dedicated macro lens is recommended for serious macro photography. These lenses can achieve 1:1 magnification and focus from infinity to the closest focus setting, capturing intricate details.
What are the important elements to consider in macro photography?
Lighting and composition are crucial elements in macro photography. The size of the subject and the angle of light hitting it should be considered. Experimenting with different angles and compositions can help capture intricate details and avoid cluttered backgrounds.
What challenges do beginners often face in macro photography?
Beginners often face challenges with depth of field and lighting in macro photography. Shallow depth of field can be controlled using smaller apertures, and focus stacking techniques can be used to achieve optimal sharpness. Diffusers, reflectors, and careful positioning of artificial lights can help overcome lighting challenges.
How can sharp focus be achieved in macro photography?
Sharp focus in macro photography requires understanding depth of field and choosing the right aperture. Smaller apertures increase the depth of field, while wider apertures create a shallow depth of field for dreamy effects. Stabilizing the camera with a tripod or other techniques helps minimize camera shake.
What creative techniques can be used in macro photography?
Manual focus can be advantageous for precise focusing, especially with tiny subjects. Using unique angles and perspectives can create interesting and visually appealing shots. Natural light can also be used effectively to enhance macro photography.

