Macro photography offers a unique opportunity to capture the intricate details of small subjects, and mastering the art of editing is crucial for creating breathtaking macro shots. When it comes to macro photography editing techniques, there are several tips and tricks that can take your images to the next level.
One of the key factors to consider is the equipment and gear needed for macro photography. Investing in a camera with manual control and interchangeable lenses is essential, as it allows for greater control over focus and composition. Additionally, macro lenses, extension tubes, tripods, and macro rails can all enhance the capturing of stunning macro shots.
But capturing the best macro shots goes beyond just having the right equipment. Selecting the right subject and composing the shot for maximum impact are crucial techniques to remember. Understanding how to utilize lighting effectively can also greatly enhance the overall quality of your macro images.
After capturing your shots, post-processing techniques come into play. Editing software, such as Luminar Neo, offers a range of tools and features specifically designed for macro photography editing. From sharpening and enhancing details to enhancing color and contrast, these post-processing techniques can help refine and enhance your macro photos.
Developing a consistent editing workflow is also important. Using presets and templates can make the editing process more efficient while experimenting with different editing styles can help you find your own unique aesthetic. Seeking inspiration from other macro photographers can further enhance your editing skills and help you develop your own signature style.
Key Takeaways:
- Invest in the right equipment for macro photography, including a camera with manual control and interchangeable lenses.
- Consider using additional gear such as macro lenses, extension tubes, tripods, and macro rails to enhance your macro shots.
- Selecting the right subject and composing your shot effectively are essential for capturing stunning macro photos.
- Utilize post-processing techniques and software designed for macro photography editing to refine and enhance your images.
- Develop a consistent editing workflow, experiment with different styles, and seek inspiration from other macro photographers to develop your own unique editing skills.
Remember, macro photography is a journey of exploration and creativity. Continuously researching and practicing will allow you to improve your skills and capture the intricate beauty of small subjects in breathtaking ways.
Essential Equipment and Techniques for Macro Photography
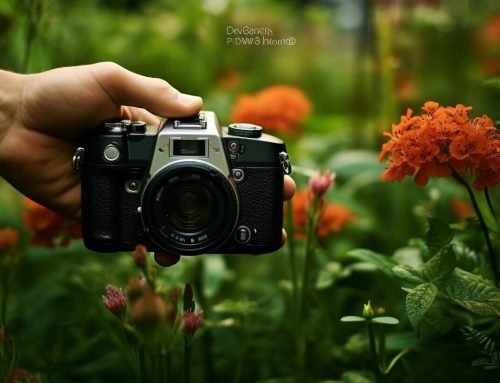
To capture stunning macro shots, it’s essential to have the right equipment and techniques at your disposal. Macro photography is all about capturing the intricate details of small subjects, and having the proper gear can make a significant difference in your results. Let’s explore some of the essential equipment and techniques that can help you level up your macro photography game.
1. Macro Lenses
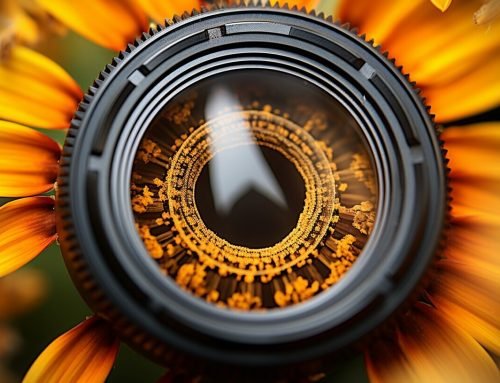
The first piece of equipment you’ll need for macro photography is a dedicated macro lens. These lenses are specifically designed to focus at close distances, allowing you to capture small subjects with enhanced detail and clarity. Macro lenses come in various focal lengths, such as 60mm, 100mm, and 180mm, each offering different perspectives and working distances. Investing in a good quality macro lens will greatly enhance your ability to capture stunning macro shots.
2. Extension Tubes
Extension tubes are another useful accessory for macro photography. These tubes fit between your camera body and lens, effectively increasing the lens-to-sensor distance. By extending the distance, extension tubes allow you to focus much closer to your subject, resulting in greater magnification and more detailed macro images. They are a cost-effective way to turn your existing lenses into macro lenses.
3. Tripods and Macro Rails
When shooting macro, even the slightest movement can cause blurriness in your shots. To combat this, it’s essential to use a sturdy tripod to keep your camera steady. A tripod will also allow you to frame your shots precisely and make precise adjustments while focusing on your subject. Additionally, macro rails can be used further to fine-tune the focus and composition of your images. They provide smooth and precise movements, enabling you to capture the intricate details of your subject with ease.
With the right equipment and techniques, you’ll be well on your way to creating stunning macro shots. Remember, macro photography is a journey of exploration and creativity. So, don’t be afraid to experiment with different techniques and styles to develop your own unique macro photography style.
Capturing the Best Macro Shots: Subject Selection and Composition
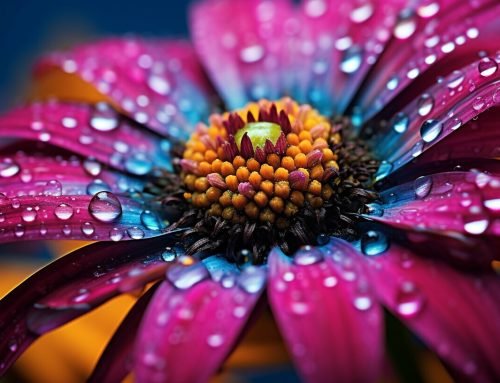
Selecting the right subject and composing your shot thoughtfully are key factors when capturing stunning macro photographs. Macro photography allows you to explore the intricate details of small subjects, so it’s important to choose topics with exciting textures, patterns, or colors that can be highlighted in your images.
When selecting a subject, look for contrasting elements, such as a vibrant flower against a dark background or a tiny insect on a textured leaf. Experiment with different angles and perspectives to find the most visually appealing composition. Remember to pay attention to the background, as a cluttered or distracting background can take away from the main subject.
Utilizing depth of field is another technique to consider in macro photography. To achieve a shallow depth of field, use a wider aperture (smaller f-number) to blur the background and draw attention to the subject. On the other hand, a deeper depth of field can be achieved by using a narrower aperture (larger f-number) to keep the entire issue and background in sharp focus.
| Subject Selection Tips: | Composition Techniques: |
|---|---|
|
|
Remember, the goal is to capture the intricate details and beauty of your subject, so take your time to compose the shot carefully and experiment with different techniques. Don’t be afraid to break the rules and try new approaches to create unique and visually captivating macro photographs.
Managing Lighting for Macro Photography
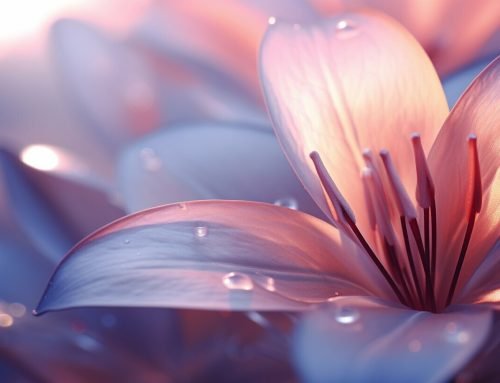
Lighting is another crucial aspect to consider when capturing macro shots. Natural light can produce stunning results, especially during the golden hours of sunrise and sunset when the light is soft and warm. However, if you’re shooting indoors or in low-light conditions, you may need to use artificial lighting sources such as a ring light, LED panels, or off-camera flash to illuminate your subject.
Diffusing harsh light can also help achieve a more pleasing and even lighting effect. You can use a diffuser or create your own using materials like a translucent plastic sheet or a white umbrella. Experiment with different lighting angles and intensities to highlight the textures and details of your subject.
Remember to take test shots and adjust your lighting setup accordingly until you achieve the desired effect. Practice and experimentation will help you develop an understanding of how light interacts with your subjects and how it can dramatically transform your macro photographs.
| Natural Lighting Tips: | Artificial Lighting Tips: |
|---|---|
|
|
Remember, lighting can make or break your macro photographs, so take the time to understand how different light sources and modifiers can enhance your images. With practice and experimentation, you’ll develop the skills to create stunning macro photography that showcases the beauty of your subjects.
Enhancing Macro Photos through Post-Processing Techniques
Post-processing is an essential step in macro photography to bring out the full potential of your images. Proper editing techniques can help enhance details, colors, and overall quality, resulting in stunning macro shots. When it comes to editing macro photos, using dedicated software can make a significant difference. One popular choice is Luminar Neo, a powerful editing tool specifically designed for macro photography.
Luminar Neo offers a range of advanced features and tools that can take your macro photo editing to the next level. One standout feature is the AI image sharpener, which intelligently enhances sharpness and clarity to bring out intricate details in your macro subjects. This tool is especially useful when working with tiny subjects like insects or flowers, where fine details matter. By selectively sharpening specific areas of your image, you can achieve optimum clarity without compromising the overall quality.
Editing Macro Photos with Luminar Neo
When editing macro photos, it’s important to have control over every aspect of the image. Luminar Neo provides a wide range of adjustment tools, including localized adjustments, color grading, and noise reduction, that allow you to fine-tune your macro images to perfection. Whether you want to enhance the vibrant colors of a flower or remove distracting elements from the background, Luminar Neo has you covered.
Another useful feature of Luminar Neo is its extensive collection of presets and templates. These pre-defined editing settings can serve as a starting point for your macro photos, saving you time and effort. You can choose from a variety of styles and effects, such as vintage, high-key, or black and white, and customize them to suit your vision. Experimenting with different editing styles can help you develop your own unique aesthetic and make your macro photos stand out.
In conclusion, post-processing techniques and the right editing software play a crucial role in enhancing macro photos. By utilizing tools like Luminar Neo, you can unlock the true potential of your images and create stunning macro shots that capture the intricate details and beauty of small subjects. Continuously exploring and practicing macro photography, experimenting with different editing techniques, and seeking inspiration from other photographers will help you refine your skills and develop your own signature style in macro photography.
| Key Points: |
|---|
| Post-processing is essential in macro photography to enhance image quality. |
| Luminar Neo is a powerful editing software designed for macro photography. |
| The AI image sharpener in Luminar Neo helps improve sharpness and clarity. |
| Luminar Neo offers a wide range of editing tools, presets, and templates for macro photography. |
| Experimenting and seeking inspiration can help you develop your own style in macro photography. |
Developing Your Editing Workflow and Finding Inspiration
Developing a consistent editing workflow and seeking inspiration are key to unlocking your full potential as a macro photographer. When it comes to editing your macro photos, having a structured workflow can help you streamline your editing process and ensure consistent results. Start by organizing your files and creating a backup system to protect your valuable images. Then, establish a step-by-step editing process that suits your style and preferences. This could include tasks such as adjusting exposure and white balance, enhancing colors and details, and applying any necessary cropping or straightening.
To further enhance your efficiency, consider using presets and templates that allow you to apply consistent edits to multiple images with just a few clicks. These can save you time and help maintain a cohesive look across your macro photography portfolio. Experimenting with different editing styles can also be beneficial, as it allows you to explore various artistic possibilities and find the look that best suits your vision.
Aside from refining your technical editing skills, seeking inspiration from other macro photographers can provide you with fresh ideas and perspectives. Explore online communities, social media platforms, and photography forums to connect with fellow macro enthusiasts. Engaging in discussions and sharing your work can help you gain valuable feedback and learn from others. You may even discover new techniques or subjects that inspire you to push the boundaries of your macro photography.
Table: Editing Workflow Checklist
| Step | Description |
|---|---|
| 1 | Organize files and create backups |
| 2 | Adjust exposure and white balance |
| 3 | Enhance colors and details |
| 4 | Apply necessary cropping or straightening |
| 5 | Experiment with artistic effects and styles |
Remember, macro photography is a journey of exploration and creativity. Don’t be afraid to try new techniques, think outside the box, and develop your own unique style. Continuously learning and practicing will help you refine your skills and capture the intricate beauty of small subjects with precision and artistry. With dedication and passion, you’ll be amazed at the breathtaking macro photos you can create.
Conclusion
Macro photography editing techniques are essential for capturing the intricate details and beauty of small subjects, and by continually exploring and refining your skills, you can create truly breathtaking macro shots.
When it comes to macro photography, having the right equipment is crucial. Using a camera with manual control and interchangeable lenses allows you to have full creative control over your shots. Investing in macro lenses, extension tubes, tripods, and macro rails can further enhance your ability to capture stunning close-up images.
However, capturing the best macro shots goes beyond having the right gear. Selecting the right subject and composing your shot effectively are key techniques to consider. By carefully choosing your subject and experimenting with different angles and compositions, you can create powerful and visually engaging macro photographs.
Once you’ve taken your macro shots, post-processing techniques can take your images to the next level. Using software like Luminar Neo, you can enhance the detail and color in your macro photos. The AI image sharpener in Luminar Neo can improve sharpness and clarity, resulting in stunningly crisp macro images.
Developing a consistent editing workflow and finding inspiration from other macro photographers can also help elevate your macro photography editing skills. By using presets and templates for efficiency and experimenting with different editing styles, you can develop your own unique editing aesthetic and create images that truly stand out.
Remember, macro photography is a journey of exploration and creativity. Continually researching and practicing your macro photography skills will not only improve your technical abilities but also allow you to express your artistic vision and capture the hidden beauty of the small world.
FAQ
What equipment do I need for macro photography?
To capture stunning macro photos, you’ll need a camera with manual control and interchangeable lenses, macro lenses, extension tubes, tripods, and macro rails.
How can I capture the best macro shots?
Selecting the right subject, composing the shot for maximum impact, and managing lighting are important techniques to keep in mind when capturing macro shots.
How can I enhance my macro photos through post-processing?
Using post-processing techniques, such as those offered by software like Luminar Neo, can refine and enhance your macro images. Features like AI image sharpening can improve sharpness and clarity.
How can I develop my editing workflow for macro photography?
Developing a consistent editing workflow, utilizing presets and templates for efficiency, experimenting with different editing styles, and seeking inspiration from other macro photographers can all contribute to editing macro photos like a pro.
What are some tips for finding inspiration in macro photography?
To find inspiration, continue researching and practicing macro photography, and explore different editing styles. Seek inspiration from other macro photographers and develop your own unique style over time.