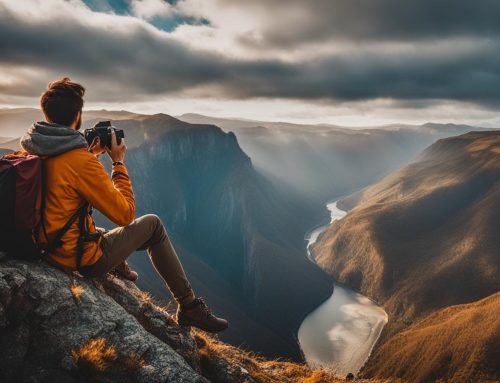
As a beginner in travel photography, it’s essential to have some tips and tricks to capture stunning images during your journeys. Whether using a professional camera or your smartphone, these tips will help you unleash your creative potential and enhance your travel photography skills.
From choosing the right gear to understanding the basics of exposure, framing your shots with composition techniques, and using natural light, we’ve got you covered. Additionally, we’ll explore how capturing different perspectives, telling a story with your photos, editing and enhancing your travel photos, connecting with local culture and people, and practicing and exploring will take your travel photography to the next level.
Key Takeaways:
- Choose the right gear that suits your needs, whether it’s a lightweight camera or a high-quality smartphone with a good camera.
- Understand the basics of exposure, including aperture, shutter speed, and ISO, to capture well-exposed images.
- Apply composition techniques like the rule of thirds, leading lines, and symmetry to create visually pleasing images.
- Use natural light, particularly during the golden hour, for soft and warm lighting in your travel photos.
- Experiment with different perspectives to add variety and interest to your travel photography portfolio.
Choose the Right Gear for Travel Photography
When it comes to travel photography, selecting the right gear is crucial for capturing stunning images. As a beginner, you want equipment that is suitable for your needs and easy to carry. Consider factors like weight, size, versatility, and image quality when making your decision.
If you prefer a dedicated camera, look for lightweight options with interchangeable lenses. This will allow you to adapt to different shooting scenarios and achieve the desired effect. Compact mirrorless cameras or entry-level DSLRs are great choices for beginners.
On the other hand, if you prefer a more portable option, a high-quality smartphone with a good camera can work wonders. Many smartphones now offer advanced camera features and manual controls, allowing you to capture professional-looking photos on the go.
No matter which gear you choose, investing in a sturdy tripod is highly recommended. It will help you achieve sharper images, especially in low-light conditions or when shooting long exposures. Additionally, don’t forget to invest in a reliable camera bag to protect your equipment while you’re on the move.
| Camera Type | Pros | Cons |
|---|---|---|
| Dedicated Camera | Interchangeable lenses, versatile shooting options | Heavier and bulkier to carry |
| Smartphone | Portable, easy to use, advanced camera features | Limited zoom capability, lower image quality in some situations |
Remember, the gear you choose should align with your creative vision and shooting style. It’s not about having the most expensive equipment, but rather understanding how to make the most of what you have. A great photographer can capture incredible images with any tool at their disposal.
Understand the Basics of Exposure
When it comes to travel photography, understanding the basics of exposure is essential. By familiarizing yourself with the three key elements of exposure – aperture, shutter speed, and ISO – you’ll be able to capture well-exposed images that truly showcase the beauty of your surroundings.
Aperture: This refers to the size of the lens opening and controls the amount of light entering the camera. A lower aperture number (e.g., f/1.8) results in a larger lens opening and a shallower depth of field, allowing you to blur the background and create a beautiful bokeh effect. On the other hand, a higher aperture number (e.g., f/16) results in a smaller lens opening and a greater depth of field, ensuring that more of the scene is in focus.
Shutter Speed: This determines the amount of time the camera’s shutter remains open, thus controlling the duration of light exposure. A faster shutter speed (e.g., 1/1000 sec) freezes motion and is ideal for capturing fast-moving subjects or sharp handheld shots. Conversely, a slower shutter speed (e.g., 1/30 sec) allows for longer light exposure, making it suitable for creating motion blur or capturing night scenes.
ISO: ISO refers to the camera’s sensitivity to light. A lower ISO setting (e.g., ISO 100) produces less noise but requires more light, making it perfect for well-lit environments. In contrast, a higher ISO setting (e.g., ISO 1600) increases the camera’s sensitivity to light, allowing you to shoot in low-light conditions but also introducing more noise into the image. Strike a balance between ISO and other exposure settings to achieve the desired result.
Experimenting with different combinations of aperture, shutter speed, and ISO will give you a better understanding of how they work together to achieve the desired effect in your travel photos. Don’t be afraid to play around with your camera settings and capture the world around you in new and exciting ways.
Table: Understanding the Basics of Exposure
| Element | Definition | Effect |
|---|---|---|
| Aperture | The size of the lens opening | Controls depth of field |
| Shutter Speed | Duration of time the shutter remains open | Controls motion blur and exposure |
| ISO | Camera’s sensitivity to light | Affects image noise and low-light capabilities |
Frame Your Shots with Composition Techniques
Composition is a crucial aspect of travel photography, as it can greatly enhance the visual impact of your images. By applying various composition techniques, you can create visually pleasing and captivating photographs that tell a story. Here are some essential tips to help you frame your shots effectively:
Rule of Thirds
The rule of thirds is a popular composition technique that involves dividing the frame into a 3×3 grid and placing your subject or focal point along the gridlines or at the intersections. This creates a sense of balance and visual interest, making your photos more engaging.
Leading Lines
Utilizing leading lines is another effective way to draw the viewer’s eye into the image and create a sense of depth. Look for natural or man-made lines such as roads, pathways, fences, or rivers that lead towards your main subject. These lines can guide the viewer’s gaze and add a dynamic element to your composition.
Symmetry
Symmetry can bring a sense of order and harmony to your images. Look for symmetrical elements like architecture, reflections, or patterns in nature. Position your subject centrally to create a symmetrical composition, or play with asymmetrical elements to add more visual interest.
Remember, composition is not about following strict rules but rather about experimenting and finding what works best for your unique vision and the specific scene you’re capturing.
Experiment with different perspectives and angles to add depth and uniqueness to your travel photographs. Consider foreground and background elements to provide context and create a more immersive experience for the viewer. By incorporating these composition techniques into your photography, you’ll be able to create stunning images that truly capture the essence of your travel experiences.
| Composition Techniques | Description |
|---|---|
| Rule of Thirds | Divide the frame into a 3×3 grid and place your subject along the gridlines or intersections for balanced composition. |
| Leading Lines | Utilize natural or man-made lines to guide the viewer’s gaze and add a sense of depth to your photos. |
| Symmetry | Create a sense of order and harmony by incorporating symmetrical elements or reflections into your composition. |
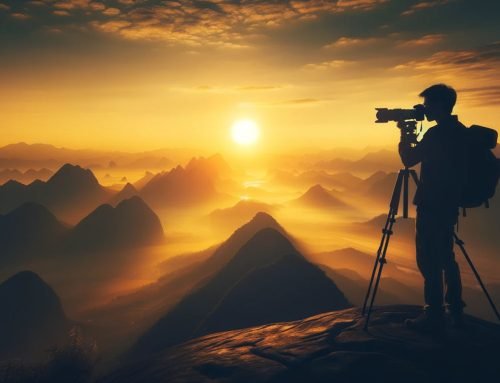
Make Use of Natural Light
When it comes to travel photography, natural light can make all the difference in capturing stunning images. The right lighting can enhance the mood, texture, and colors in your photos, taking them to the next level. As a beginner travel photographer, it’s important to understand how to make the most of natural light to create captivating compositions. Here are some tips and advice on utilizing natural light to elevate your travel photography game:
1. Avoid harsh midday sunlight:
Shooting during the midday sun can result in harsh shadows and washed-out colors. Instead, aim to capture your photos during the golden hour, which is the hour after sunrise or before sunset. During this time, the light is soft, warm, and creates a beautiful glow, adding a touch of magic to your images.
2. Embrace the unique lighting conditions:
Each location you visit will have its own distinct lighting conditions. Whether it’s the soft rays of the morning sun, the dramatic lighting during sunset, or the diffused light in a forest, embrace these unique lighting situations and use them to your advantage. Experiment with different angles and perspectives to capture the atmosphere and mood that the light creates.
3. Use natural light to enhance the mood:
Natural light can evoke different emotions and set the mood in your travel photos. Pay attention to how the light filters through objects, illuminates your subject, and creates shadows. Play with the interplay between light and shadow to add depth, drama, and a sense of storytelling to your images.
Remember, as a beginner travel photographer, practice is key. Experiment with different lighting conditions, study how light interacts with your subjects, and develop your own style. With time and experience, you’ll become more proficient at using natural light to create captivating travel photos that truly capture the essence of your journey.
| Tip | Description |
|---|---|
| Avoid harsh midday sunlight | Shooting during the golden hour provides soft, warm light for more appealing photos. |
| Embrace unique lighting conditions | Each location has its own lighting characteristics, make use of them to add interest to your images. |
| Use light to enhance the mood | Explore how light and shadows interact to create a specific atmosphere and storytelling element in your photos. |
Experiment with Different Perspectives
To make your travel photos truly stand out, it’s important to experiment with different perspectives. By capturing scenes from unique angles and viewpoints, you can add variety and interest to your travel photography portfolio. Here are some tips to help you take your travel photos to the next level:
1. Get Down Low
One way to create captivating travel photos is to get down low and take ground-level shots. By crouching or even lying down on the ground, you can capture a different perspective that showcases the foreground and adds depth to your images. This technique works especially well when photographing landscapes, flowers, or interesting textures.
2. Venture to Higher Vantage Points
Rather than sticking to eye-level perspectives, try climbing to higher vantage points for aerial views of your surroundings. This could involve finding a lookout point, hiking to a hilltop, or even venturing onto a rooftop. A bird’s-eye view can give your travel photos a unique and expansive look, showcasing the beauty of the entire scene.
3. Explore Off the Beaten Path
Don’t be afraid to venture off the beaten path in search of hidden gems and unique angles. While popular tourist spots can offer stunning photo opportunities, sometimes the most memorable shots are found in lesser-known locations. Take the time to explore and discover new perspectives that others might not have captured before.
Remember, the key to experimenting with different perspectives is to think outside the box and approach your subjects from new angles. Don’t be afraid to get creative and take risks with your compositions. By doing so, you’ll be able to capture travel photos that truly stand out and tell a unique story.
| Perspective | Advantages | Examples |
|---|---|---|
| Ground-level shots | Adds depth and showcases foreground elements | Close-up of flowers, textures in the sand |
| Aerial views | Offers a unique and expansive look | Cityscapes, landscapes from a hot air balloon |
| Off the beaten path | Allows for discovery of lesser-known locations | Hidden alleyways, secluded beaches |
Tell a Story with Your Photos
Each journey has its own unique story, and as a travel photographer, your goal is to tell that story through your images. Capturing stunning travel photos goes beyond just capturing beautiful landscapes and landmarks. It’s about capturing emotions, cultural elements, and the local atmosphere, creating a narrative that resonates with viewers and transports them to the destination.
When taking travel photos, look for compelling subjects that evoke the essence of the location. Take the time to observe your surroundings and seek out the little details that make each place special. Whether it’s a street vendor selling local delicacies, a group of children playing in the streets, or a mesmerizing sunset over the ocean, these authentic moments help convey the story of a place.
Don’t be afraid to capture candid moments that showcase the daily lives of the people you encounter during your travels. Seek permission respectfully before taking portraits, as this allows you to establish a connection and capture the genuine spirit of the individuals you photograph. These portraits can provide a deeper insight into the culture and create a personal connection between the viewer and your images.
Remember to pay attention to composition and framing when telling a story with your photos. Consider the rule of thirds, leading lines, and symmetry to create visually pleasing and balanced compositions. By carefully composing your shots, you can guide the viewer through the image and draw their attention to the key elements that contribute to the story you’re telling.
Tips for Telling a Story with Your Photos:
- Look for compelling subjects that evoke the essence of the destination
- Capture candid moments that showcase the daily lives of locals
- Seek permission respectfully before taking portraits
- Pay attention to composition and framing
- Use elements like the rule of thirds and leading lines to guide the viewer through the image
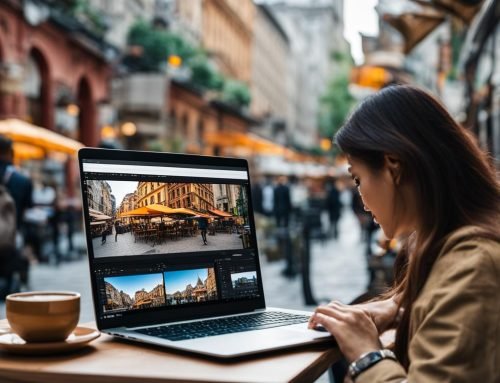
Edit and Enhance Your Travel Photos
Editing is an essential part of the travel photography process. By using editing software, you can enhance the colors, contrast, and sharpness of your images to make them truly stand out. Developing your own editing style is key to creating a cohesive and unique portfolio of travel photos. Experiment with different editing techniques, but always strive to keep your edits natural and avoid excessive manipulation.
When editing your travel photos, pay attention to the following aspects:
- Color correction: Adjust the colors in your photos to accurately represent the scene as you remember it. Enhance the vibrancy or desaturation to match the mood you want to convey.
- Contrast and sharpness: Use these tools to add depth and definition to your images. Increase the contrast for a more dramatic effect and sharpen the details to bring out the finer elements in your photos.
- Crop and straighten: Remove any distractions or unnecessary elements by cropping your photos. Also, make sure the horizon is straight to maintain a balanced composition.
- Noise reduction: Depending on the lighting conditions, your photos may have visible noise or grain. Use noise reduction tools to minimize these imperfections and create a cleaner image.
Remember, editing should enhance your photos, not completely change them. Aim for an authentic representation of the scene while adding your own creative touch.
To help you understand the impact of editing, here is a comparative analysis of a travel photo before and after editing:
| Before Editing | After Editing |
|---|---|
 | |
In the “Before Editing” image, the colors appear dull, and the photo lacks contrast and sharpness. However, after editing, the “After Editing” image showcases vibrant colors, improved contrast, and enhanced details. This transformation is the result of careful editing to bring out the true beauty of the scene.
Tips for Editing Travel Photos:
- Backup your originals: Always keep a copy of your original, unedited photos to preserve the integrity of your work and allow for future re-editing if needed.
- Experiment with different presets: Editing software often provides presets that apply specific adjustments to your photos. Try different presets to find the one that best suits your style or needs.
- Take breaks while editing: Looking at your photos for an extended period can lead to fatigue and bias in your editing decisions. Take breaks to refresh your eyes and perspective.
- Seek feedback and learn from others: Share your edited photos with fellow photographers or online communities to gather constructive feedback and learn new editing techniques.
Remember, editing is a creative process that allows you to transform your travel photos into captivating visual stories. Embrace the editing journey, experiment, and enjoy the opportunity to bring your vision to life.
Connect with Local Culture and People
When it comes to travel photography, capturing the essence of a destination goes beyond just photographing landscapes and landmarks. To truly tell the story of a place, it’s important to connect with the local culture and people. By immersing yourself in the local community and documenting their daily lives, you’ll be able to create images that reflect the spirit of the destination in an authentic way.
Interact with Locals
One of the best ways to connect with the local culture is to interact with the locals themselves. Engage in conversations, learn about their traditions, and show genuine interest in their way of life. This not only allows you to form meaningful connections but also provides you with valuable insights that can be translated into powerful visual storytelling.
Respect and Permission
When photographing people, it’s important to approach them with respect and ask for permission before taking their portraits. Be mindful of cultural sensitivities and local customs, as what may be acceptable in one place may not be in another. Taking the time to build trust and rapport with your subjects will result in more authentic and emotive photographs.
Capture Authentic Moments
Look for the candid and everyday moments that capture the true essence of a place. Whether it’s a local market bustling with activity, a craftsman practicing their trade, or children playing in the streets, these authentic moments help to create a narrative that goes beyond surface-level observations. Remember to observe and capture the small details that make a culture unique and to portray the emotions and stories behind each image.
| Benefits of Connecting with Local Culture and People | Tips for Photographing Locals |
|---|---|
|
|
Practice and Explore
As a beginner travel photographer, the key to improving your skills is practice and exploration. Take your camera with you wherever you go, even on your daily outings. Every opportunity is a chance to experiment with different techniques, settings, and perspectives. Whether you’re exploring your local neighborhood or venturing to new destinations, make it a habit to capture the beauty of the world through your lens.
One way to enhance your skills is by challenging yourself to try new things. Push your creative boundaries by experimenting with different genres of photography. While travel photography may be your main focus, you can also explore portrait photography, street photography, or landscape photography. This not only diversifies your portfolio but also improves your overall understanding of composition, lighting, and storytelling.
To keep track of your progress and inspire yourself, create a travel photography journal. Jot down your thoughts, ideas, and experiences during your photo adventures. Include notes on the locations, camera settings used, and any challenges you faced. This journal serves as a personal creative outlet and a valuable resource for reflection and improvement.
Lastly, don’t be afraid to seek inspiration from other photographers. Study the work of renowned travel photographers and analyze their techniques and artistic choices. Join online photography communities or attend workshops to connect with fellow enthusiasts and learn from their experiences. By immersing yourself in the world of travel photography and continuously honing your skills, you’ll be well on your way to becoming a confident and accomplished travel photographer.
Table: Essential Tips for Practicing and Exploring
| Tip | Description |
|---|---|
| Always carry your camera | Opportunities for great shots can arise unexpectedly, so be prepared. |
| Experiment with different photography genres | Diversify your skills by exploring various types of photography. |
| Create a travel photography journal | Keep track of your progress, ideas, and challenges in a personal journal. |
| Seek inspiration from other photographers | Analyze the work of renowned travel photographers and join photography communities. |
Conclusion
Mastering travel photography as a beginner takes time and practice, but with the right tips and a passion for exploration, you’re on the right path. By following these essential beginner photography tips and tricks, you’ll be well-equipped to capture breathtaking travel photos that preserve your memories for years to come.
Remember to enjoy the journey and embrace the unique experiences each destination offers. As you practice and explore, take your camera with you wherever you can and experiment with different techniques and settings. Push your creative boundaries and seek out new destinations, both near and far, to capture the beauty of the world through your lens.
Whether you’re using a professional camera or a smartphone, these tips will enhance your travel photography skills. From choosing the right gear and understanding the basics of exposure to framing your shots with composition techniques and making use of natural light, each aspect contributes to creating stunning images. Additionally, connecting with the local culture and people adds depth and authenticity to your travel photos, allowing you to tell a compelling story.
So, keep practicing, exploring, and capturing the world around you. With time, dedication, and these beginner photography tips and tricks, your travel photography will continue to evolve, capturing the beauty and essence of each destination you visit.
FAQ
What gear should I use for travel photography as a beginner?
It’s recommended to use a lightweight camera with interchangeable lenses or a high-quality smartphone with a good camera. Additionally, invest in a sturdy tripod and a camera bag to protect your gear while on the move.
What are the key elements of exposure in photography?
The key elements of exposure are aperture, shutter speed, and ISO. Aperture controls the depth of field, shutter speed determines the amount of light entering the camera, and ISO affects the sensitivity to light.
What composition techniques can I apply in travel photography?
You can apply composition techniques like the rule of thirds, leading lines, symmetry, and consider foreground and background elements to add depth and context to your photos.
When is the best time to shoot for natural light in travel photography?
Avoid shooting during harsh midday sunlight and opt for the golden hour – the hour after sunrise or before sunset – for soft, warm light that enhances the mood and atmosphere of your travel photos.
How can I add variety to my travel photography?
Try capturing scenes from different perspectives such as getting down low for ground-level shots, climbing to higher vantage points for aerial views, or venturing off the beaten path for unique angles.
How can I tell a story with my travel photos?
Look for compelling subjects, capture candid moments, and include details that evoke the essence of the destination. By portraying emotions, cultural elements, and the local atmosphere, you’ll create a narrative that resonates with viewers.
What editing techniques should I use for travel photography?
Use editing software to enhance the colors, contrast, and sharpness of your images. Develop your own editing style that reflects your vision and the mood you want to convey, but remember to keep your edits natural and avoid excessive manipulation.
How can I connect with local culture and people in my travel photography?
Interact with locals, learn about their culture, and document their daily lives. Respectfully approach people and ask for permission before taking their portraits to capture authentic moments that reflect the spirit of the destination.
How can I improve my travel photography skills?
The more you practice, the better you’ll become. Take your camera with you whenever possible, practice different techniques, experiment with settings, and push your creative boundaries. Explore new destinations and capture the beauty of the world through your lens.