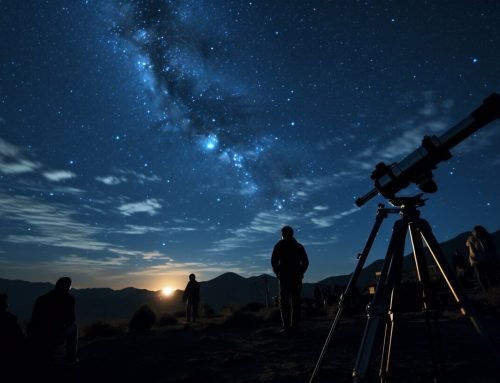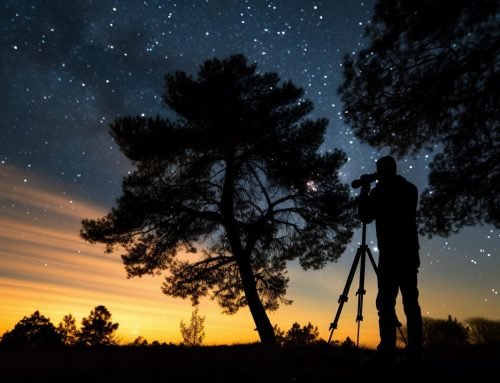
Welcome to the wonderful world of astrophotography, where you capture stunning images of the night sky. However, taking a great photo is only half the battle; the other half involves editing it to perfection. Editing astrophotography allows you to enhance your images by manipulating various elements and achieving stunning results.
In this guide, you will discover the importance of post-processing techniques and how they can take your astrophotography to the next level. We will delve into the different editing techniques and software used in astrophotography, as well as advanced techniques for those who want to take their editing skills to the next level.
Key Takeaways:
- Editing astrophotography is a crucial step in enhancing your space images.
- Post-processing techniques can take your astrophotography to the next level.
- There are different editing techniques and software tools available for astrophotography.
- Advanced techniques such as stacking and blending multiple exposures can create breathtaking images.
- Practical tips and tricks for astrophotography editing workflow can increase efficiency and create consistent results.
Understanding Astrophotography Editing Techniques
If you want to create stunning astrophotographs, mastering editing techniques is essential. While astrophotography is a challenging and rewarding field, post-processing can take your images to the next level. Let’s delve into some of the top astrophotography editing techniques.
Noise Reduction
Noise in astrophotography is unavoidable due to the high ISO settings and long exposure times used to capture faint objects in the sky. Noise reduction techniques involve minimizing this grainy texture without losing detail in the image. Several software tools offer noise reduction algorithms, including Adobe Photoshop, Lightroom, and specialized astrophotography software like PixInsight.
Color Correction
Color correction is essential to achieve accurate colors in astrophotographs. The color balance is often skewed due to light pollution, camera sensor limitations, or other environmental factors. Color correction techniques involve adjusting the white balance, hue, and saturation to produce natural colors. Adobe Photoshop, Lightroom, and specialized astrophotography software are the go-to tools for color correction.
Sharpening
Sharpening is the process of enhancing image details, emphasizing edges and textures. It is essential to sharpen astrophotographs to bring out the fine details, stars, and nebulae. Several techniques can be used for sharpening astrophotographs, including unsharp masking, deconvolution, and wavelet sharpening. Specialized astrophotography software such as PixInsight offers advanced sharpening algorithms.
Blending Multiple Exposures
Blending multiple exposures is a technique used to enhance the dynamic range of astrophotographs. In astrophotography, it is often challenging to capture all the faint details of the night sky in a single shot. Blending multiple exposures can help to bring out the faint details, even in light-polluted areas. Several software tools offer exposure blending capabilities, including Adobe Photoshop, Lightroom, and specialized astrophotography software.
Stacking
Stacking is a powerful technique that involves combining multiple images of the same object or scene to reduce noise and enhance details. It is an essential technique in astrophotography, especially for deep-sky objects like galaxies and nebulae. Stacking software automatically aligns and blends multiple images, resulting in a cleaner image with more details. Some popular stacking software includes DeepSkyStacker, Sequator, and PixInsight.
These are just a few examples of the astrophotography editing techniques you can use to enhance your images. Practice and experimentation are essential to master these techniques and take your astrophotography to the next level.
Choosing the Right Astrophotography Editing Software
Editing software is an essential tool for enhancing your astrophotography images. There are several software options available, each with unique features and capabilities. Here is an overview of the best astrophotography editing tools:
Adobe Photoshop
Adobe Photoshop is a popular choice for editing astrophotography images. It offers a wide range of tools and features such as noise reduction, color correction, and layering that can take your astrophotography to the next level. Photoshop is compatible with both Windows and Mac operating systems.
PixInsight
PixInsight is a comprehensive astrophotography software that includes advanced editing tools like multichannel processing, deconvolution, and noise reduction. It is a popular choice among astrophotography enthusiasts, and its user-friendly interface makes it easy to use. PixInsight is only compatible with Windows operating systems.
DeepSkyStacker
DeepSkyStacker is a popular software tool for stacking multiple astrophotography images into a single image. It also offers alignment and integration functions, making it an excellent option for creating stunning deep sky images. DeepSkyStacker is compatible with both Windows and Mac operating systems.
Affinity Photo
Affinity Photo is a powerful editing software that offers many of the same features as Adobe Photoshop at a lower price point. It includes a range of tools for astrophotography editing such as noise reduction, stacking, and color correction. Affinity Photo is compatible with both Windows and Mac operating systems.
When choosing the right astrophotography editing software tools, consider your budget, technical skill level, and the features you require. Take advantage of the free trial versions of software to determine which one works best for your needs.
Advanced Astrophotography Editing Techniques
If you’re ready to take your astrophotography editing skills to the next level, it’s time to explore advanced techniques that can make your images truly stand out. Here are some techniques to consider:
Stacking
Stacking is the process of combining multiple images of the same scene to create a single, high-quality image. This technique can help reduce noise and improve the overall clarity of your astrophotographs. Consider using specialized software like DeepSkyStacker or Sequator to align and stack your images.
Blending Multiple Exposures
Blending multiple exposures is a popular technique used by astrophotographers to create stunning, dynamic images of the night sky. This involves combining different exposures of the same scene to create a final image with a broader range of light and details. Use software like Photoshop or GIMP to blend multiple exposures and create an image that captures the full majesty of the cosmos.
Using Specialized Astrophotography Filters
Specialized astrophotography filters can help you capture the faint details of deep-sky objects, like nebulas and galaxies. These filters block specific wavelengths of light, reducing light pollution and enhancing the contrast and details of your images. Consider using filters like the Hydrogen-Alpha (Ha) filter, the Oxygen-III (OIII) filter, or the Sulphur-II (SII) filter to capture the best possible astrophotographs.
Experiment and Practice
As with any skill, mastering advanced astrophotography editing techniques takes time, patience, and practice. Be sure to experiment with different techniques and find the ones that work best for you. With enough practice and dedication, you can take your astrophotography to new heights.
Astrophotography Editing Tips and Workflow
Editing astrophotography can be a daunting task, but with the right tips and workflow, you can streamline the process and create stunning images of the night sky. Here are some astrophotography editing tips and workflow to enhance your space images.
1. Take advantage of presets
Presets can be a time-saver when it comes to astrophotography editing. They can help you achieve a consistent look and feel across your images. Consider creating your presets or using ones available online that are specific to astrophotography.
2. Organize your files
Keeping your files organized can save you time and frustration during the editing process. Consider creating a folder structure that makes sense, such as sorting images by date, location, or subject. Don’t forget to back up your files regularly!
3. Start with basic adjustments
Start your editing process with basic adjustments, such as adjusting exposure, contrast, and brightness. These adjustments can help you bring out details in your image and create a solid foundation for additional editing.
4. Use layer masking
Layer masking is a valuable technique for astrophotography editing, allowing you to selectively adjust different parts of your image. This technique can be used for noise reduction, sharpening, and color correction.
5. Experiment with blending modes
Blending modes can help you achieve unique effects and enhance your astrophotographs. Experiment with different blending modes, such as lighten or screen, to bring out more detail in your images.
6. Don’t overdo it
It’s easy to get carried away with editing, but be careful not to overdo it. Remember that astrophotography is about capturing the beauty of the night sky, and too much editing can detract from that.
By following these astrophotography editing tips and workflow, you can create stunning images of the night sky that showcase its natural beauty. Remember to practice, experiment, and have fun with the editing process. Happy editing!
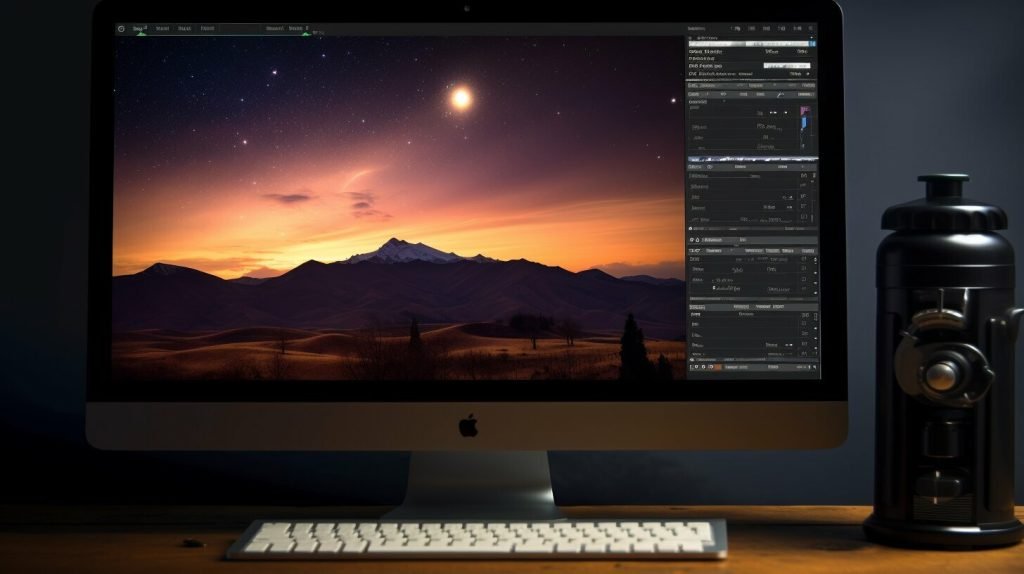
Astrophotography Editing Tutorial
Congratulations! You’re now ready to dive into the world of editing astrophotography. In this tutorial, we will guide you through the process of enhancing your space images into stunning works of art. We recommend using Adobe Photoshop or Lightroom for this tutorial, but you can also apply these techniques in other editing software.
Step 1: Basic Adjustments
Start by adjusting the overall exposure, contrast, and brightness of your astrophotograph. Use the Levels or Curves tool to adjust the black and white points, as well as the midtones. Next, apply noise reduction using the Noise Reduction filter to minimize any graininess or speckles in the image.
Step 2: Color Correction
Correct the color of your astrophotograph to achieve a more natural and vivid representation of space. Use the Color Balance tool to balance the colors of the stars, galaxies, and nebulae. Adjust the hue, saturation, and luminosity of individual colors using the Hue/Saturation tool. Use the Vibrance tool to boost the intensity of colors without oversaturating them.
Step 3: Sharpening
Sharpen your astrophotograph to enhance the details of the stars, galaxies, and nebulae. Use the Unsharp Mask tool to sharpen the edges and contours of the objects in your image. Be careful not to oversharpen, which can produce unwanted artifacts and halos.
Step 4: Advanced Techniques
Take your editing skills to the next level by applying advanced astrophotography techniques like stacking, blending multiple exposures, and using specialized filters. Experiment with different techniques to achieve unique and creative results, and don’t be afraid to make mistakes along the way.
Step 5: Workflow
Develop a consistent workflow that streamlines your editing process and maximizes your efficiency. Organize your files, apply presets, and save your edits in a systematic way that allows you to easily retrieve and compare your images. Use keyboard shortcuts and other time-saving tips to speed up your workflow.
By following these steps, you can master the art of editing astrophotography and create stunning images of the night sky. Remember to practice, experiment, and continue learning to improve your editing skills. Good luck!
Conclusion
Congratulations on completing this detailed guide on editing astrophotography! By now, you should have a solid understanding of the importance of post-processing techniques to enhance your space images. Remember that astrophotography editing is an art form that requires practice, experimentation, and continuous learning.
Experiment and Practice
Now that you have gained knowledge of the various editing techniques used in astrophotography, it’s time to experiment with them and find your own unique editing style. Remember, there are no fixed rules for astrophotography editing, and the possibilities are endless.
Practice is key to perfecting your skills, so don’t hesitate to spend time editing your images and exploring new techniques. Keep in mind that not every edit will work out as planned, but learning from your mistakes is essential for growth and improvement.
Continuous Learning
As with any art form, astrophotography editing is continually evolving, with new techniques and software emerging regularly. Stay up-to-date on the latest trends, techniques, and software tools by following relevant blogs, tutorials, and forums.
By continuously learning and practicing, you’ll be able to create stunning images of the night sky that leave your audience in awe.
Wrap Up
We hope that this guide has helped you understand the nuances of astrophotography editing and provided you with valuable insights and tips for enhancing your space images. Remember, the key takeaways from this guide are practice, experimentation, and continuous learning.
Now it’s time to apply your new knowledge and start editing your astrophotographs. Who knows, you might just capture the next iconic image of the universe!
FAQ
What is astrophotography editing?
Astrophotography editing refers to the process of enhancing and optimizing images of celestial objects captured using a camera and telescope. It involves using various post-processing techniques to improve clarity, color, and overall visual impact.
Why is astrophotography editing important?
Editing astrophotography allows you to bring out the intricate details and stunning beauty of space objects that may be hidden in the initial captured image. It helps enhance the visual appeal, correct imperfections, and create a final image that truly showcases the wonders of the night sky.
What are some common astrophotography editing techniques?
Common astrophotography editing techniques include noise reduction, color correction, contrast adjustments, sharpening, and enhancing details in specific areas. These techniques help improve the overall quality and clarity of the image.
Which software tools are best for editing astrophotography?
There are several software tools available for editing astrophotography, such as Adobe Photoshop, PixInsight, DeepSkyStacker, and StarTools. The choice of software depends on your specific requirements, budget, and level of expertise.
What are some advanced astrophotography editing techniques?
Advanced astrophotography editing techniques include image stacking, blending multiple exposures, using specialized astrophotography filters, and creating composite images. These techniques allow for more precise control over the final image and can result in breathtaking astrophotographs.
Any tips for astrophotography editing workflow?
To streamline your astrophotography editing workflow, it’s important to establish a consistent process. Organize your files, create presets for commonly used adjustments, and practice non-destructive editing. Additionally, consider using batch-processing techniques to save time when editing multiple images.
Can you provide a tutorial on how to edit astrophotography?
Yes! In our astrophotography editing tutorial, we will guide you through the step-by-step process of editing astrophotography. From basic adjustments to advanced techniques, this tutorial will help you improve your editing skills and create stunning space images.