If you’ve ever gazed up at the night sky and wished to capture its beauty, astrophotography is the answer. Capturing celestial objects can seem daunting, but with the right techniques and equipment, it’s easier than you may think. In this article, we’ll explore the best tips to help you master the art of astrophotography, and take professional-quality photos of the night sky.
Key Takeaways:
- With the right techniques and equipment, capturing stunning photos of the night sky is possible
- Understanding astrophotography equipment is essential before you begin
- Knowing the perfect camera settings for astrophotography is key to achieving great results
- Specific techniques are required to capture stars, planets, and deep space objects
- Capturing the Milky Way requires long exposure photography techniques and careful consideration of location and timing
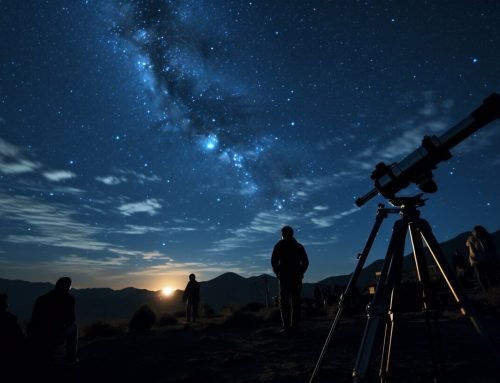
Understanding Astrophotography Equipment
To capture celestial objects in all their glory, you need the right astrophotography equipment. Here are the essentials:
- Camera: DSLR or mirrorless cameras with manual settings and interchangeable lenses are ideal for astrophotography. Full-frame cameras are preferable, but APS-C sensors can also work well.
- Lens: Wide-angle lenses with apertures of f/2.8 or faster are recommended. A 14-24mm or 16-35mm lens is a great starting point.
- Tripod: A sturdy tripod is necessary to keep your camera steady during long exposure shots. Look for a tripod that can support the weight of your camera and lens.
- Remote Shutter Release: A remote shutter release will prevent camera shake when you press the shutter button. A cable release or wireless remote will work.
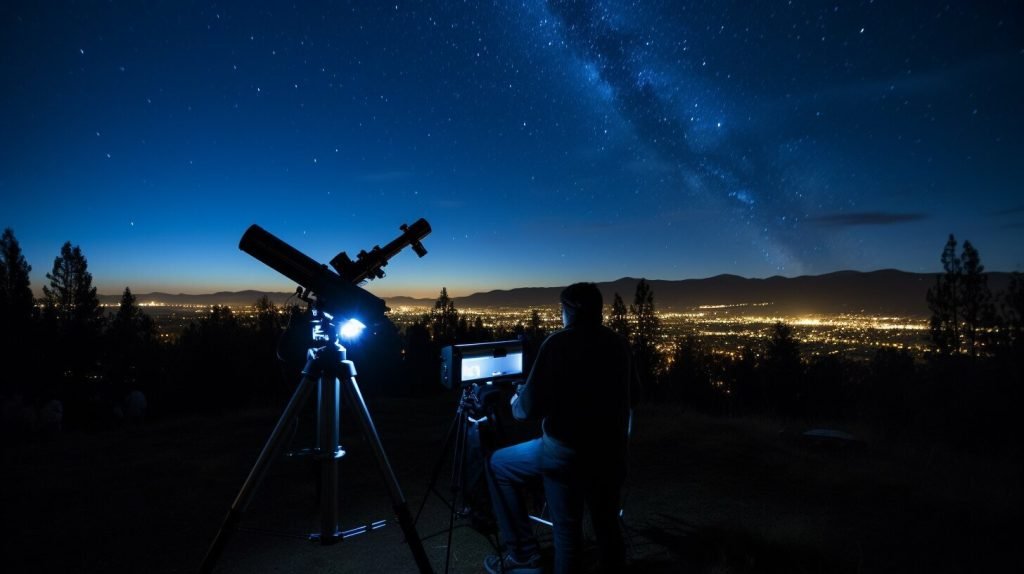
- Star Tracker: A star tracker is optional but recommended for longer exposures and improved image quality. It will compensate for the rotation of the earth, allowing you to capture sharp images of stars and other celestial objects.
By investing in quality astrophotography equipment, you’ll have the tools you need to capture stunning photos of the night sky.
Perfect Camera Settings for Astrophotography
Photographing celestial objects requires a different set of camera settings than regular photography. Here are some of the best camera settings for astrophotography:
- Use a high ISO: A high ISO is necessary for taking photos in low light conditions such as the night sky. Try setting your ISO to 1600 or higher to capture bright and detailed shots of stars and planets.
- Use a wide aperture: A wide aperture allows more light to reach the camera sensor, enabling you to capture more detail in your photos. Try setting your aperture to f/2.8 or lower.
- Use a slow shutter speed: A slow shutter speed is necessary to allow enough time for light to enter the camera and create a clear image of the celestial object. Experiment with different shutter speeds, but a good starting point is around 20-30 seconds.
- Turn off image stabilization: Image stabilization can sometimes cause blurry images in astrophotography, so it’s best to turn it off when shooting stars and planets.
Tip: Consider shooting in RAW format instead of JPEG. This will give you more flexibility in post-processing and allow you to bring out more detail in your photos.
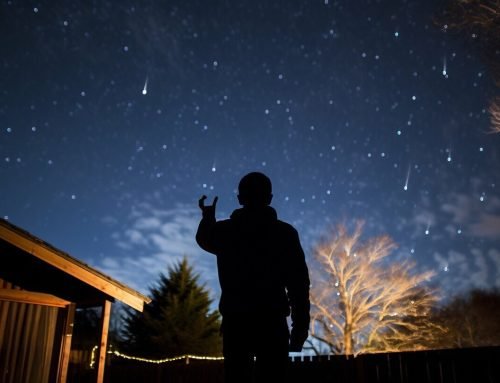
Techniques for Photographing Stars and Planets
When it comes to photographing stars and planets, there are several techniques that will help you capture clear and detailed photos of celestial objects. Here are some tips to keep in mind:
Focusing Properly
One of the key elements in capturing celestial objects is focusing properly. You may find it difficult to focus on stars or planets in the night sky, but there are a few tricks that will help you get it right. If you have a live-view mode on your camera, use it to zoom in on a bright star or planet and adjust your focus manually. Another technique is to use the infinity focus point on your lens, which is usually marked with a symbol that looks like ∞.
Using Star Trackers
Star trackers are devices that help you track the movement of the stars in the night sky. By attaching your camera to a star tracker, you can take longer exposures without capturing star trails. This will give you sharper and more detailed photos of celestial objects.
Employing Other Astrophotography Techniques
There are several other astrophotography techniques that can help you capture stunning photos of stars and planets. One technique is to use a high ISO setting, which will make your sensor more sensitive to light. Another technique is to use a wide aperture, which will let in more light and create a shallower depth of field. Additionally, using longer shutter speeds can allow you to capture more details in the night sky.
Experimenting with Celestial Photography Techniques
Don’t be afraid to experiment with different techniques and settings to achieve the desired results in your celestial photography. Try different exposure lengths, different lenses, and even different locations to see what works best for the specific object you want to capture.
By employing these techniques and experimenting with different settings, you can capture stunning photos of stars and planets and elevate your astrophotography skills to the next level.
Capturing Deep Space Objects
Capturing the beauty of deep space objects like galaxies and nebulae is a challenging but rewarding task in astrophotography. To capture these celestial objects, you’ll need the right equipment and techniques. Here are some tips to help you get started:
Choose the Right Telescope
To capture deep space objects, you will need a telescope. The size and type of telescope you need will depend on the type of object you want to photograph. A telescope with a larger aperture will allow you to capture more light, making it easier to photograph faint objects.
Use a Mount
A mount is an essential piece of equipment in deep space astrophotography. A mount will keep your telescope steady and allow you to track celestial objects as they move across the sky. A good mount will help you capture sharper and more detailed photos.
Practice Patience
Deep space astrophotography requires patience. Capturing faint objects like galaxies and nebulae can take several minutes or even hours of exposure time. Be prepared to spend a lot of time waiting for your camera to capture enough light.
Use Specialized Filters
Specialized filters can help you capture the colors of deep space objects more accurately. Filters can also help block out light pollution, making it easier to capture faint objects in areas with a lot of light pollution.
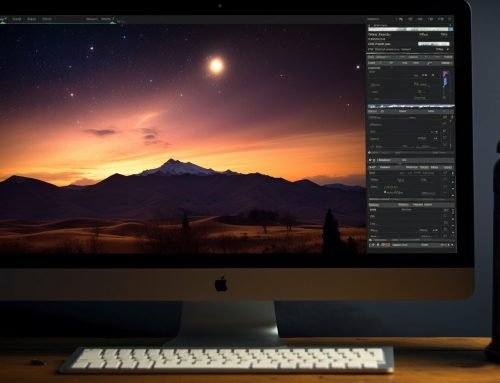
Post-Processing
Post-processing is an essential part of deep space astrophotography. Because you will be capturing faint objects, your photos may appear dark or have a lot of noise. Post-processing can help you bring out the details and colors of your photos.
With these tips, you can start capturing the beauty of deep space objects through astrophotography. Remember to be patient, use the right equipment, and don’t be afraid to experiment and try new techniques.
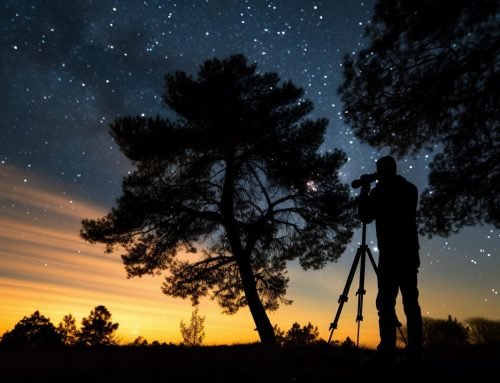
Shooting the Milky Way
The Milky Way is a stunning celestial feature that many astrophotographers dream of capturing. With long exposure photography techniques, you can create beautiful images that showcase the galaxy’s magnificence.
To begin shooting the Milky Way, it’s important to find a location with minimal light pollution. This allows you to capture the full brilliance of the galaxy without any interference from city lights.
Once you’ve found the right location, set up your camera on a sturdy tripod. Use a wide-angle lens to capture as much of the Milky Way as possible.
Long Exposure Settings
To create stunning images of the Milky Way, you’ll need to use long exposure times. This allows your camera to capture more light, resulting in brighter and more detailed images.
Start by setting your ISO to 3200 or higher, depending on your camera’s capabilities. Use the widest aperture your lens allows, typically around f/2.8 or f/4. Finally, set your shutter speed to around 20-30 seconds.
Experiment with different settings to find the perfect balance between exposure time, ISO, and aperture. Remember to check your images as you go, adjusting your settings as needed to achieve the desired effect.
Other Tips for Capturing the Milky Way
When shooting the Milky Way, it’s important to keep your camera stable throughout the exposure. Consider using a remote shutter release to minimize any shaking that could occur when pressing the camera’s shutter button.
You may also want to use a star tracker, a device that rotates your camera to match the movement of the stars. This allows for even longer exposure times and clearer images of the Milky Way.
Finally, be sure to dress warmly and bring plenty of snacks and water. Shooting the Milky Way can be a time-consuming process, so it’s important to be prepared and comfortable.
With these tips and techniques, you can capture stunning images of the Milky Way and showcase the beauty of our galaxy through your astrophotography.
Conclusion
Capturing celestial objects through astrophotography is an exciting and challenging endeavor. With the help of the tips and techniques shared in this article, you’re now equipped to take stunning photos of the night sky and its celestial wonders.
Remember that the right equipment, camera settings, and techniques can make a world of difference in your astrophotography journey. Take the time to practice and experiment with different approaches until you find what works best for you.
Unleash your Astronomy Photography Prowess
Whether you’re looking to capture breathtaking photos of stars, planets, or deep space objects, the secrets to capturing celestial objects are now yours to discover. With a little patience and dedication, you too can take stunning photos of the night sky and uncover the wonders of the universe.
So go ahead, step outside, and start capturing celestial objects today. Your newfound astrophotography skills will undoubtedly amaze and inspire you for years to come.
Congratulations on mastering the art of capturing celestial objects!
FAQ
What is astrophotography?
Astrophotography is the art of capturing celestial objects, such as stars, planets, galaxies, and nebulae, through photography. It involves using specialized equipment and techniques to capture the beauty of the night sky.
What equipment do I need for astrophotography?
To get started with astrophotography, you will need a camera with manual settings, preferably a DSLR or mirrorless camera. You will also need a sturdy tripod to keep your camera steady during long exposures. Additionally, a wide-angle lens with a low aperture (f/2.8 or lower) is recommended. Other accessories like a remote shutter release and a star tracker can enhance your astrophotography experience.
What are the best camera settings for astrophotography?
The ideal camera settings for astrophotography may vary depending on the conditions and the celestial objects you are capturing. However, as a general guideline, it’s recommended to use a high ISO (between 1600-3200), a wide aperture (around f/2.8 or lower), and a long shutter speed (15-30 seconds) to capture enough light from the stars. Experimenting with these settings will help you achieve the desired results.
How can I focus properly for astrophotography?
Achieving proper focus in astrophotography can be challenging, especially in dark conditions. One technique is to use manual focus and set your lens to infinity (∞) or use a hyperfocal distance chart to ensure sharp focus. Another helpful tip is to use the Live View mode on your camera and zoom in on a bright star to fine-tune your focus manually.
What are some techniques for photographing stars and planets?
To photograph stars and planets, it’s essential to minimize camera shake. Using a sturdy tripod and a remote shutter release can help eliminate vibrations. Additionally, using a star tracker can compensate for the Earth’s rotation, allowing for longer exposures and capturing more details in the night sky. Experimenting with different exposure times and stacking multiple images can also enhance the quality of your astrophotographs.
How can I capture deep space objects in my astrophotography?
Capturing deep space objects like galaxies and nebulae requires advanced techniques and equipment. Using a telescope with a camera adapter can help magnify distant objects. Additionally, longer exposure times, typically several minutes to hours, are needed to gather enough light from these faint objects. Learning about image stacking and post-processing techniques can also greatly enhance the visibility of deep space objects in your astrophotographs.
What are the best times and locations for shooting the Milky Way?
The Milky Way is most visible during the summer months in the Northern Hemisphere, typically from April to September. It’s important to choose a location away from light pollution, such as a dark sky reserve or a remote rural area, to minimize light interference. Shooting during moonless nights or when the moon is low on the horizon can also help to bring out the Milky Way’s details. Checking astronomical apps or websites can provide information on the best times and locations for capturing the Milky Way in your area.