 astrophotography techniques” width=”1024″ height=”574″ />
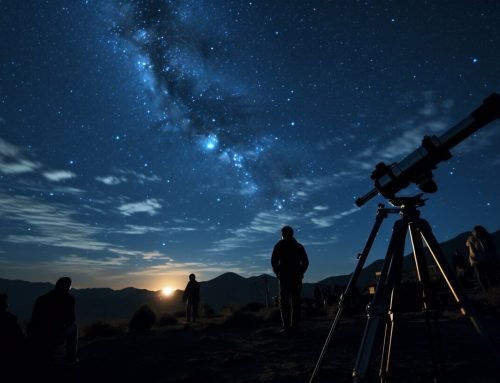
Welcome to the world of astrophotography! Whether you are a seasoned photographer looking to expand your skills or a beginner interested in learning something new, this article will introduce you to essential astrophotography techniques and tips that will help you capture stunning images of the night sky.
From camera equipment and settings to composition techniques and post-processing, we will guide you through everything you need to know to create beautiful astrophotographs.
Key Takeaways:
- Astrophotography techniques can help bring the beauty of the night sky to life.
- From equipment to camera settings and composition, there are many crucial aspects to consider when capturing astrophotographs.
- With the right techniques and tools, anyone can create awe-inspiring images under the starry sky.
- Explore these techniques and tips to master the art of astrophotography and unlock the wonders of the universe.
Getting Started with Astrophotography
Are you interested in capturing stunning images of the night sky? As a beginner in astrophotography, you may feel overwhelmed by the vast array of equipment available for this exciting hobby. However, don’t let the abundance of options deter you from diving in and exploring the universe through your lens. In this section, we will guide you through the essential equipment and gear you need to get started with astrophotography.
Astrophotography for Beginners: What Equipment Do You Need?
Before you begin capturing images of the night sky, you’ll need a few essential pieces of equipment. Here are the key items you should invest in to kickstart your astrophotography journey:
- A camera with manual controls: For the best results in astrophotography, choose a camera that allows you to adjust the shutter speed, aperture, and ISO settings manually.
- A sturdy tripod: A tripod is necessary to keep your camera stable and minimize any shaking or movement that can cause blurring in your images.
- A remote shutter release: This accessory allows you to trigger your camera without touching it, which reduces the risk of camera shake and ensures sharper images.
- A wide-angle lens: A lens with a wide aperture and focal length of 14-24mm is ideal for astrophotography, allowing you to capture a wider field of view and more stars in your images.
- A red light: Using a red light instead of a white light will prevent your eyes from becoming accustomed to the dark, which will allow you to focus on your camera settings and capture better images.
Astrophotography Equipment: What Other Gear Can You Get?
If you’re serious about astrophotography, there are several other pieces of equipment and accessories that you may want to consider adding to your arsenal:
- A camera lens with a higher f-number: A lens with a higher f-number (e.g. f/2.8 or f/4) will allow less light to enter the lens and produce sharper images with less distortion.
- A star tracker: This device will help you capture long exposures of the night sky and track the movement of the stars, allowing you to get clearer and more detailed images.
- A filter: Filters can help you reduce light pollution and enhance the visibility of stars and galaxies in your images.
- A laptop: A laptop can be a useful tool for reviewing and editing your images on the go.
Now that you know what equipment you need, you’re well on your way to capturing stunning images of the night sky. In the next section, we’ll dive into the intricacies of camera settings for astrophotography.
Understanding Camera Settings for Astrophotography
As an astrophotographer, understanding your camera settings is essential to capturing stunning celestial images. Here, we will explore the basic principles of astrophotography camera settings and reveal tips for long exposure astrophotography.
Exposure Time
The exposure time refers to the amount of time your camera’s shutter is open. In astrophotography, longer exposure times are necessary to capture the light from distant stars and galaxies. For static objects such as the Milky Way, you can use exposure times of 15-30 seconds. However, for capturing star trails, exposures of several minutes to even a few hours may be required.
ISO
The ISO value determines the sensitivity of your camera’s sensor to light. In low light conditions, increasing the ISO can help capture more light. However, high ISO values can also introduce noise and reduce the quality of your images. To minimize noise, start with an ISO of 800-1600 and adjust accordingly based on the brightness of the stars and environment.
Aperture
The aperture controls the amount of light that enters your camera’s lens. Wider apertures (lower f-numbers) allow more light to enter and are better suited to capturing the night sky. However, a wide aperture can also result in a shallow depth of field, making it difficult to keep all elements of your image in focus. Start with an aperture of f/2.8-4 and adjust accordingly based on the desired depth of field.
Long Exposure astrophotography tips
When capturing long exposures, it’s essential to use a tripod and a remote shutter release to minimize camera shake. Additionally, you may want to experiment with stacking multiple exposures to reduce noise and improve image quality. Finally, consider using a noise reduction tool in post-processing to enhance the clarity of your images further.
Composition Techniques for Astrophotography
Composition is a crucial aspect of astrophotography. It involves creatively arranging various elements in your shot to produce visually stunning images of the night sky. By utilizing the right composition techniques, you can enhance the overall impact of your astrophotographs. Here are some astrophotography composition tips to help you capture breathtaking celestial images:
1. Incorporate Foreground Elements
Adding foreground elements to your shot can add depth and perspective to your astrophotographs. It helps create a sense of scale and visual interest, drawing the viewer’s eye towards the main subject.
Pro Tip: Use natural elements such as trees, mountains, or rocks to frame your shots and create a sense of balance.
2. Use the Rule of Thirds
The rule of thirds is a fundamental composition guideline that helps to create well-balanced and aesthetically pleasing images. According to this concept, you should imagine a grid with two vertical and two horizontal lines dividing your frame into nine equal parts. Align your subject along these lines or at their intersections to create a harmonious and balanced composition.
3. Experiment with Different Angles
Try shooting from different angles to add variety to your astrophotographs. Varying your perspective can add a unique twist to your shots and create a sense of dynamism. For instance, try shooting upwards towards the sky or downwards towards the ground to create a different look and feel.
4. Frame the Milky Way
The Milky Way is a stunning subject that can add a magical touch to your astrophotographs. Try framing the Milky Way by placing it in the center of your shot and using foreground elements to create balance.
Pro Tip: Use a wide-angle lens to capture more of the Milky Way and create a more immersive effect.
5. Experiment with Different Apertures
Changing your aperture can have a significant impact on the outcome of your astrophotographs. A large aperture (small f-number) allows more light to enter the lens, producing brighter and more vibrant stars. A smaller aperture (large f-number) produces sharper and more detailed stars. Experiment with different apertures to find the one that works best for your desired effect.
- Incorporate foreground elements to add perspective to your shots.
- Use the rule of thirds to create balance and harmony.
- Experiment with different angles to create a sense of dynamism.
- Frame the Milky Way for a magical touch.
- Experiment with different apertures for the desired effect.
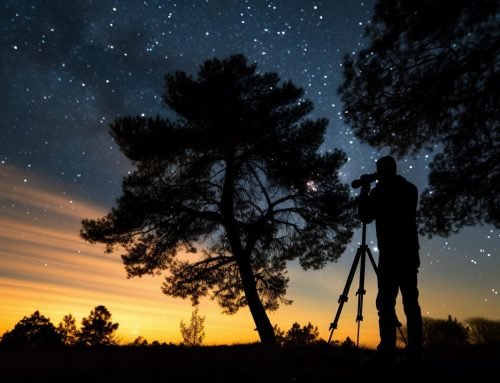
Capturing the Milky Way
There’s nothing quite like capturing the Milky Way in all its glory. With the right techniques and tips, you can create breathtaking images that showcase the mesmerizing beauty of our galaxy. Here are some astrophotography tips to help you capture stunning images of the Milky Way:
Choose the Right Location
The first step to capturing the Milky Way is to find a location with minimal light pollution. Look for areas with dark skies, away from city lights and other sources of light pollution. Plan and check weather conditions to ensure clear skies on the night of your shoot.
Pick the Right Time
The best time to photograph the Milky Way is during the summer months when the galactic center is visible in the northern hemisphere. Aim to shoot during a new moon phase to avoid bright moonlight overpowering the stars.
Use the Right Lens
A wide-angle lens is ideal for capturing the Milky Way. Look for a lens with a focal length between 14mm and 24mm, with a wide aperture of f/2.8 or wider to capture more light and detail.
Adjust Your Camera Settings
Regarding astrophotography camera settings for capturing the Milky Way, use a long exposure time of 20-30 seconds, a high ISO between 3200-6400, and an aperture of f/2.8 or wider. Adjust the white balance to a cooler setting to reduce the yellow hues sometimes present in astrophotographs.
Compose Your Shot
When composing your shot, consider adding a foreground element such as a tree, rock or body of water to add depth and perspective. Position the Milky Way in the upper third of the image for a pleasing composition.
Follow these Milky Way photography tips to capture stunning images of our galaxy and unlock the beauty of the universe in your astrophotographs.
Post-Processing Your Astrophotographs
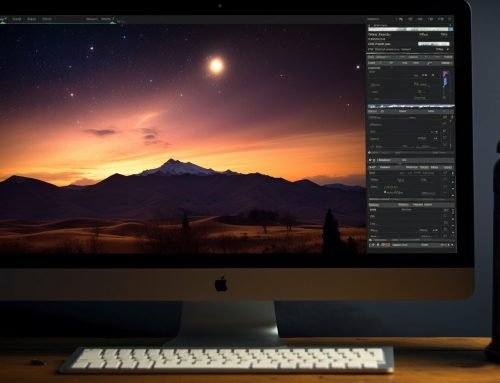
Congratulations on capturing stunning images of the night sky! Now, it’s time to take your astrophotographs to the next level through post-processing techniques. In this section, we will guide you through the steps in editing your images to bring out the full potential of the night sky.
Step 1: Importing Your Images
Start by transferring your images from your camera to the computer. Use professional editing software such as Adobe Photoshop or Lightroom for the best results.
Step 2: Adjusting Basic Settings
Adjust the basic settings such as brightness, contrast, and highlights to enhance the overall look of the image. However, be careful not to overdo it, as this can result in an unrealistic appearance.
Step 3: Sharpening the Image
Sharpening the image helps bring out the details of the stars and galaxies. Use the sharpening tool cautiously, as excessive sharpening can make the image appear grainy and ruin the overall look.
Step 4: Reducing Noise
Noise reduction is crucial for astrophotography since the images are often captured using high ISO settings. Use the noise reduction tool to remove the graininess and make the image look smoother.
Step 5: Adjusting Color Balance
Color balance is essential for astrophotography to bring out the true colors of the universe. Adjust the saturation and hue to make the image appear more natural without over-saturating it.
Step 6: Final Touches
Finally, add any final touches, such as cropping or straightening the image. Save a high-quality version of the edited image for printing or sharing on social media platforms.
Pro Tip: Before exporting, zoom in to 100% and carefully examine the image for any flaws or artifacts. This attention to detail can make a big difference in the quality of the final image.
By following these astrophotography post-processing tips, you can transform your raw captures into captivating images. Experiment with different techniques and have fun exploring the endless possibilities of the universe through your camera lens!
Tips for Night Sky Photography
Photographing the night sky is a magical experience that can produce stunning results. Whether you are capturing the Milky Way, star trails, or other celestial objects, here are some astrophotography tips to help you make the most of your night sky photography:
1. Find a Dark Location
One of the most important factors in night sky photography is finding a location that is free from light pollution. Look for areas away from cities or towns where the sky is dark and clear. Use apps like Dark Sky Finder to locate the best spots near you.
2. Use the Right Equipment
Investing in the right gear is crucial for capturing high-quality night sky photos. Use a fast and wide-angle lens with a low aperture, like f/2.8 or lower, to capture more light. Consider using a tripod and a remote shutter release to prevent camera shake and capture clear, sharp images.
3. Get Familiar with Camera Settings
Learning how to adjust camera settings for night sky photography is essential. Use a high ISO setting (1600 or 3200) to capture more light and adjust your exposure time to compensate for the dark environment. Experiment with different settings to achieve the desired effect.
4. Capture the Milky Way
Capturing the Milky Way is a popular subject in astrophotography. Look for opportunities to photograph the Milky Way during new moon phases when the sky is darkest. Use a high ISO and a lower aperture to capture more light and reveal the details of our galaxy.
5. Experiment with Different Techniques
Don’t be afraid to try new techniques and experiment with different styles of night sky photography. Play around with long exposures to capture star trails or use light painting techniques to create unique and imaginative photos.
With these astrophotography tips, you can capture breathtaking images of the night sky that will leave you and your viewers in awe. Remember to always practice safety and respect for the environment when engaging in night sky photography.
Conclusion
As you conclude your reading, you are now well-equipped with astrophotography techniques that help you unlock the stars. By combining your passion for photography with the wonders of the night sky, you can capture mesmerizing images that leave viewers in awe.
Starting with the right equipment, you can experiment with camera settings and composition techniques to find the ideal balance that will showcase the beauty of the stars, galaxies, and the Milky Way. The post-processing techniques will help you enhance your astrophotographs and create visually stunning images.
With the tips and techniques provided in this article, you can also extend your repertoire to night sky photography beyond astrophotography. You can unleash your creativity to capture the starry sky in all its forms, including star trails and light painting techniques.
So, grab your equipment and head out to your favorite location. Remember, practice makes perfect, and with each attempt, you will hone your skills and capture breathtaking images of the universe. Keep exploring, keep learning, and let your love for astrophotography take you to infinity and beyond.
FAQ
What is astrophotography?
Astrophotography is the art and technique of capturing images of celestial objects, such as stars, galaxies, and the Milky Way, using specialized camera equipment and long-exposure photography.
Can I practice astrophotography as a beginner?
Absolutely! Beginners and experienced photographers alike can enjoy astrophotography. This guide provides essential techniques and tips to help you get started and improve your astrophotography skills.
What equipment do I need for astrophotography?
To get started with astrophotography, you will need a camera capable of manual settings, a sturdy tripod, a wide-angle lens, and a remote shutter release. Additional accessories such as star trackers and telescopes can enhance your astrophotography capabilities.
How do I adjust camera settings for astrophotography?
Adjusting camera settings for astrophotography involves selecting a long exposure time, using a high ISO setting, and setting the aperture wide open to capture as much light as possible. This allows for capturing the faint light of stars and other celestial objects.
What are some composition techniques for astrophotography?
Composition plays a crucial role in astrophotography. You can enhance your images by incorporating foreground elements, framing the Milky Way, and utilizing the rule of thirds. Experimenting with different compositions can help you create visually striking astrophotographs.
How can I capture the Milky Way in my astrophotographs?
Capturing the Milky Way requires finding a location with minimal light pollution and planning your shoot during the appropriate time of year when the Milky Way is most visible. Optimizing your camera settings and using techniques like stacking can help you capture the intricate details of our galaxy.
How can I enhance my astrophotographs through post-processing?
Post-processing is an essential step in astrophotography. Using software tools like Adobe Photoshop or Lightroom, you can adjust the colors, contrast, and sharpness of your images. Techniques such as noise reduction and star enhancement can bring out the beauty of the night sky.
Are there any tips for night sky photography beyond astrophotography?
Yes, night sky photography encompasses more than just astrophotography. You can explore techniques like capturing star trails, creating light paintings, photographing the moon and other celestial events. Experimenting with different subjects and styles will expand your night sky photography skills.