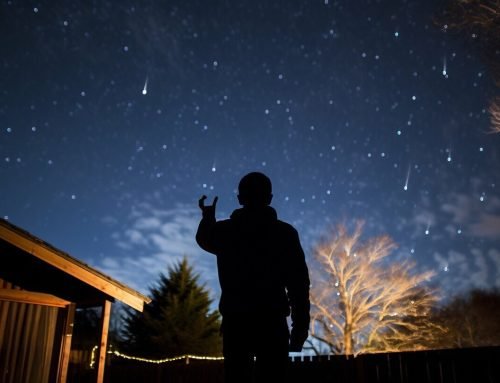
Are you ready to capture stunning images of the night sky? Then you need to master astrophotography settings. These camera settings are essential for capturing the beauty of stars, galaxies, and other celestial objects. By understanding the best camera settings for astrophotography, you can unlock the secrets to stunning astrophotography.
In this section, we will explore the essential astrophotography settings that will help you capture breathtaking images of the cosmos. From exposure settings to fine-tuning your camera, we will guide you through the essential aspects of astrophotography settings.
Key Takeaways
- Astrophotography settings are crucial for capturing stunning images of the night sky.
- Understanding the best camera settings for astrophotography will help you unlock the secrets to stunning astrophotography.
- In this section, we will explore the essential astrophotography settings you need to master for breathtaking astrophotography.
Understanding Astrophotography Equipment
Before you can take stunning astrophotography images, you need to have the right equipment. The following are some essential items you’ll need:
Camera
The most important piece of equipment for astrophotography is, of course, a camera. You can use a DSLR, mirrorless, or point-and-shoot camera, as long as it has manual controls for aperture, shutter speed, and ISO. Full-frame cameras are often preferred because they have larger sensors that capture more light.
Lens
For astrophotography, you’ll need a wide-angle lens with a low f-stop, such as f/2.8 or lower. This will allow more light to reach your camera’s sensor and capture the stars in all their beauty. A focal length of around 14-24mm is ideal for wide-field astrophotography.
Mount
Using a tripod or mount is crucial to keep your camera stable during long exposures. A sturdy tripod should be able to support the weight of your camera and lens while preventing any vibrations caused by wind or other factors. A motorized mount is even better, as it will allow you to track the movement of the stars and capture stunning images.
Accessories
Other gear that can enhance your astrophotography experience includes a remote shutter release to prevent camera shake, a battery grip to extend your camera’s battery life, and a red flashlight to help you see your equipment and settings in the dark without decreasing your night vision.
Remember, the right equipment can make all the difference when it comes to astrophotography. Invest in quality gear that suits your needs, and you’ll be on your way to capturing stunning images of the cosmos.
- Remember to start with a camera that has manual controls.
- Wide-angle lenses with a low f-stop are ideal for astrophotography.
- Keeping your camera stable on a mount or tripod will help create crisp images.
Astrophotography tips and Tricks
As you explore the cosmos through your lens, you may encounter various obstacles that can hinder your astrophotography experience. Here are some astrophotography tips and tricks to help you overcome these common challenges:
1. Finding the Right Location
When it comes to astrophotography, finding the right location is crucial. Look for dark locations with minimal light pollution, and ensure that you have a clear view of the night sky. Try using apps like Dark Sky Finder or Light Pollution Map to find the ideal spot.
2. Proper Focusing Techniques
One of the most important astrophotography tips is to ensure that your images are in focus. Use manual focus to ensure sharp images of celestial objects, and try using a Bahtinov mask to achieve precise focus. You can also try using the live view mode on your camera to zoom in and manually focus on the stars.
3. Choosing the Right Exposure Settings
Choosing the right exposure settings is critical for capturing stunning images of the cosmos. Experiment with different aperture, shutter speed, and ISO settings to find the right balance for your equipment and the conditions. Try using the rule of 500 or 600 to calculate the maximum shutter speed for capturing stars without trailing.
4. Dealing with Light Pollution
Light pollution can be a major obstacle in astrophotography, but there are ways to overcome it. Try using light pollution filters or adjusting your white balance to minimize the orange glow of light pollution. You can also try shooting during new moon or near moonless nights when the sky is darker.
5. Tracking Celestial Objects
If you want to capture stunning images of celestial objects, you need to track their movement. Use a star tracker or equatorial mount to ensure that your camera moves along with the stars, and experiment with longer exposures to capture more light. You can also try stacking images to improve the quality of your astrophotography.
6. Practice and Patience
Finally, remember that astrophotography takes practice and patience. Don’t get discouraged if your first attempts don’t turn out as expected. Keep experimenting, learning, and trying new techniques. With enough practice and perseverance, you will start to capture breathtaking images of the cosmos.
Mastering Astrophotography Techniques
When it comes to astrophotography, it’s not just about the right camera settings. It’s also about mastering the various techniques involved in capturing stunning images of the cosmos. In this section, we’ll explore some of the most important astrophotography techniques you need to know.
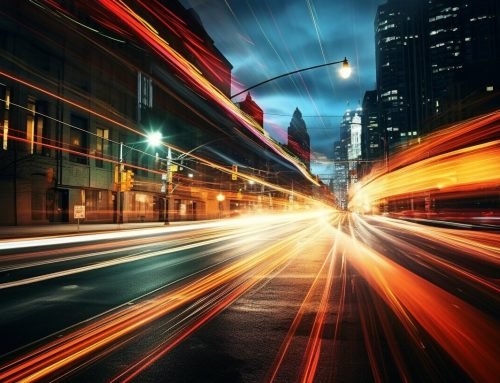
Long-Exposure Photography
Long-exposure photography is a technique that allows you to capture more light and detail in your astrophotography images. With this technique, you keep the camera’s shutter open for an extended period, allowing more light to hit the camera’s sensor. This technique is ideal for capturing star trails and the Milky Way.
Stacking Images for Better Quality
Stacking images is another essential technique in astrophotography. It involves taking multiple images of the same object and merging them into a single image. This technique helps reduce noise and increase the overall quality of the image. To stack images, you will need specialized software such as DeepSkyStacker or Sequator.
Tracking the Movement of Celestial Objects
To capture images of planets, moons, and other celestial objects, you need to track their movement in the night sky. This technique requires using a motorized mount that moves your camera in sync with the movement of the object you’re photographing. This technique is essential for capturing detailed images of the planets and their moons.
Using Filters for Different Effects
Filters are another critical aspect of astrophotography, allowing you to control the amount of light and other elements that enter your camera. For example, a light pollution filter can help reduce the effects of light pollution, while a narrowband filter can help you capture specific wavelengths of light emitted by specific celestial objects like nebulae.
Experimenting with Different Angles and Perspectives
Finally, don’t be afraid to experiment with different angles and perspectives when capturing astrophotography images. Try moving your camera to different locations, changing your focal length, or using a different lens altogether. By experimenting with these techniques, you can unlock new creative possibilities and capture unique and visually stunning images.
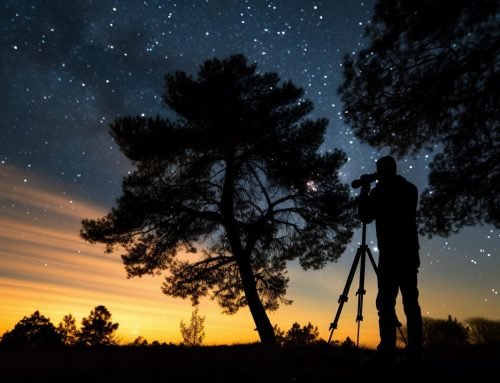
Setting Up Your Astrophotography Gear
Proper setup is essential for successful astrophotography. Follow these steps for optimal gear setup:
Find a Stable Surface
Your tripod should be sturdy and secure to avoid any movement during long exposures. Consider adding additional weight, like a sandbag, to further stabilize the tripod.
Polar Alignment
For accurate tracking of celestial objects, you need to align your mount with the North Star. Use a polar scope or a smartphone app to find the precise alignment angle.
Connect Cables and Check Battery Levels
Before shooting, ensure that your camera is connected to any necessary cables, such as intervalometers, and that your battery is fully charged or has enough power to last throughout the shoot.
Avoid Light Pollution
Choose a location with minimal light pollution to reduce the impact on your final images. Turn off any unnecessary lights or cover them with red filters to minimize their impact.
Organize Your Gear
Keep your gear organized and easily accessible. Use cable ties or velcro straps to manage cables and prevent tangling during the shoot. Use a backpack or carrying case to keep everything neatly organized and secure during transport.
Optimizing Astrophotography Exposure Settings
Getting the right exposure is crucial for capturing stunning astrophotography images. The exposure settings on your camera determine how much light enters the camera and affects the brightness of the image. Let’s dive into some of the key astrophotography exposure settings that you should consider for your next shoot.
ISO Settings
ISO determines the camera sensor’s sensitivity to light. When shooting at night, it is recommended to use a higher ISO, which will make the camera more sensitive to light. However, using a high ISO setting can lead to noise in your images, so finding the right balance is key. Start with a high ISO setting, and adjust as needed to find the best exposure without introducing excess noise into your images.
Shutter Speed Settings
Shutter speed determines how long your camera’s shutter stays open, allowing light to enter the camera. As a general rule, it is recommended to use a longer shutter speed for astrophotography. Longer shutter speeds allow more light to enter the camera, making it easier to capture stars and other celestial bodies. However, longer shutter speeds also increase the risk of motion blur, so it’s important to use a tripod to keep your camera stable and minimize the risk of blur.
Aperture Settings
Aperture determines the amount of light that enters the camera through the lens. A larger aperture (represented by a smaller f-number) allows more light to enter the camera, making it easier to capture dimmer objects in the night sky. However, using a larger aperture can also lead to shallower depth of field, which can cause parts of your image to be out of focus. Finding the right balance is key, so try different aperture settings to find the optimal exposure for your shot.
White Balance Settings
White balance settings determine the overall color temperature of your image. In astrophotography, it is recommended to use a custom white balance setting to capture the true colors of celestial objects. You can also experiment with different white balance settings to create a unique visual style for your images.
Histogram
The histogram is a graph that represents the distribution of light in your image. Use the histogram to evaluate the exposure of your image and adjust your settings as needed. A well-exposed image will have a smooth histogram that is spread out, while an underexposed image will have a histogram that is bunched up on the left side.
By mastering the essential astrophotography exposure settings, you can capture stunning images of the cosmos with ease. Experiment with different settings to find the optimal exposure for your shots, and enjoy the beauty of the night sky through your lens.
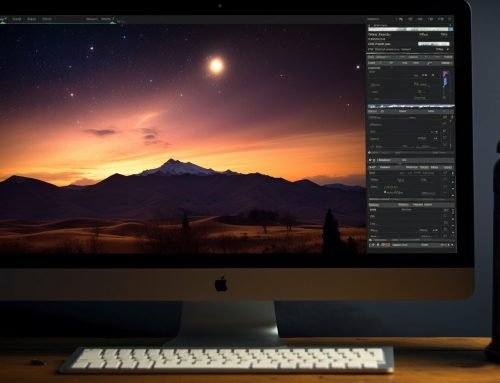
Fine-Tuning Your Astrophotography Settings
Now that you have optimized your camera exposure settings for astrophotography, it’s time to fine-tune your astrophotography camera settings to capture the most stunning images of the night sky.
Reduce Noise with Long Exposure Noise Reduction
Long exposure photography, especially in low light, often results in noisy images. To reduce noise, enable your camera’s Long Exposure Noise Reduction (LENR) feature. This feature takes a second exposure for the same duration as your initial exposure, but with the shutter closed to capture only noise. The camera then subtracts the noise from the original image, resulting in a cleaner image.
Adjust White Balance for Accurate Colors
Proper white balance is essential for capturing accurate colors in your images. While many cameras offer an automatic white balance mode, it is advisable to set your white balance manually for astrophotography. Choose the “Tungsten” or “Incandescent” preset to compensate for the yellow/orange hue of artificial light in the night sky.
Use Manual Focus for Sharper Images
In low-light conditions, autofocus can struggle to focus on your subject. Switch to manual focus and use Live View to achieve sharp focus. Start by focusing on a bright star or planet and adjust your focus until the object is sharp and clear.
Experiment with Different Focusing Methods
In addition to manual focusing, there are other methods you can try to achieve sharper images. One option is to use a Bahtinov mask, which creates diffraction spikes around bright stars, making it easier to focus. Another option is to use auto-guiding, which uses a separate tracking device to keep your camera pointed at the same celestial object throughout the exposure, resulting in sharper images.
By fine-tuning your astrophotography settings, you can capture even more stunning images of the night sky. Whether you’re reducing noise with LENR, adjusting white balance, or experimenting with different focusing methods, taking the time to fine-tune your settings will take your astrophotography to the next level.
Conclusion
Now that you have acquired a comprehensive understanding of astrophotography, you can experiment with a variety of techniques and gear to capture astonishing images of the cosmos. Remember to set up your equipment correctly, optimize your exposure settings, and fine-tune your astrophotography settings to achieve optimal results.
Armed with astrophotography tips and tricks, you can overcome common challenges such as light pollution and focus on capturing sharp and clear images. Knowing how to stack images, track celestial objects, and apply noise reduction techniques will help you produce breathtaking images that showcase the beauty of the night sky.
Whether you’re using a DSLR, mirrorless, or smartphone camera, mastering the art of astrophotography settings will allow you to capture the magic of the cosmos like never before. With patience, practice, and a passion for capturing the stars, the sky is the limit – literally. So grab your gear, head outside, and start exploring the wonders of the universe through your lens.
FAQ
What are the best camera settings for astrophotography?
The optimal camera settings for astrophotography include a high ISO (usually between 800-3200), a wide aperture (such as f/2.8 or lower), and a long shutter speed (usually between 15-30 seconds). These settings allow you to capture more light from the stars and create stunning images of the night sky.
What equipment do I need for astrophotography?
To get started with astrophotography, you will need a DSLR or mirrorless camera, a sturdy tripod, a wide-angle lens, and a remote shutter release. Additionally, other useful equipment may include a star tracker, a light pollution filter, and a portable power source for longer shoots.
What are some astrophotography tips and tricks?
Here are a few astrophotography tips and tricks to enhance your results: 1) Find a dark location away from light pollution, 2) Use a red flashlight to preserve your night vision, 3) Experiment with different compositions and foreground elements, 4) Take multiple exposures and stack them later for better image quality, and 5) Shoot during the golden hour for a natural balance of light between the sky and the foreground.
How do I set up my astrophotography gear?
Setting up your astrophotography gear involves ensuring stability with a sturdy tripod, aligning your camera to the north star for accurate tracking (polar alignment), and organizing cables to minimize the risk of tangling or interfering with your shots.
What are the optimal exposure settings for astrophotography?
The optimal exposure settings for astrophotography depend on the conditions and the desired effect. Generally, you should start with an ISO between 800-3200, a shutter speed of 15-30 seconds, and an aperture of f/2.8 or wider. Experiment with different settings to achieve the desired level of detail and brightness in your images.
How can I fine-tune my astrophotography settings?
To fine-tune your astrophotography settings, consider employing noise reduction techniques such as long exposure noise reduction (found in camera settings), adjust the white balance to correct color casts, and experiment with focusing methods like manual focus or using a bahtinov mask for sharp and clear images.