If you are looking to take your photography skills to the next level, long-exposure photography is definitely worth exploring. With slow shutter speeds, you can create stunning effects, especially in low light situations, making it ideal for night photography. In this guide, we will teach you the secrets to capturing mesmerizing long-exposure shots, explore the essential camera settings, and delve into advanced techniques to help you achieve stunning results.
Key Takeaways
- Long-exposure photography is an excellent technique for capturing stunning images in low light conditions.
- Slow shutter speed is crucial to creating the desired effect in long-exposure photography.
- Night photography is a great genre to experiment with long-exposure techniques.
- Understanding basic camera settings and modes is essential to achieving the desired results in long-exposure photography.
- With advanced techniques, such as light painting and the use of filters, you can take your long-exposure photography skills to the next level.
Understanding the Basics of Long-Exposure Photography
If you’re new to long-exposure photography, it’s essential to understand the basics before diving in. One of the key factors in creating remarkable long-exposure shots is to have your camera settings appropriately configured. The right settings will help you achieve the desired effect in your images.
The first step is to set your camera to manual mode. This mode provides complete control over all the settings, including the shutter speed, aperture, and ISO. Start by setting the ISO to the lowest possible value to reduce noise in the images.
Next, adjust your aperture to the desired setting. Keep in mind that a smaller aperture number represents a larger opening, which means more light enters the camera. A larger aperture number represents a smaller opening, resulting in less light.
The most crucial setting in long-exposure photography is the shutter speed. The longer the time the shutter stays open, the more light enters the camera, resulting in brighter and more blurry images. Experiment with various shutter speeds to find the perfect balance between motion blur and sharpness in your images.
Using the Bulb Mode
Bulb mode is a camera setting that allows the shutter to stay open for a more extended period, beyond the usual 30 seconds. The camera shutter remains open as long as you press the shutter button. This mode is useful for capturing shots in low-light situations, such as night photography or capturing the movement of stars.
Using a Remote Shutter Release
A remote shutter release lets you trigger your camera without touching it, eliminating any chance of camera shake. Camera shake can be caused by the slightest movement and can ruin long-exposure shots. A remote shutter release allows you to take images without touching the camera, ensuring the shots remain sharp and in focus.
With these essential camera settings and techniques, you’re now ready to start experimenting with long-exposure photography. Remember to take your time and experiment with different settings for stunning results.
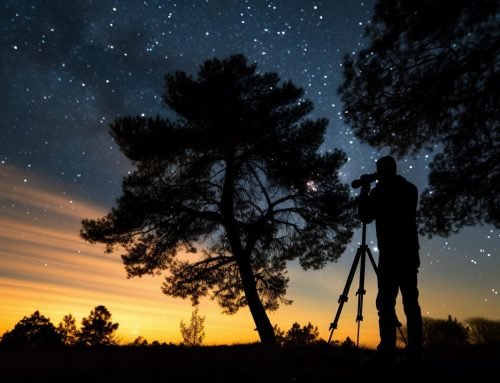
Creating Stunning Light Trails and Motion Blur
Long-exposure photography offers a mesmerizing way to capture the movement of light and create stunning images. With the right techniques, you can capture everything from light trails to breathtaking motion blurs.
Mastering Light Trails
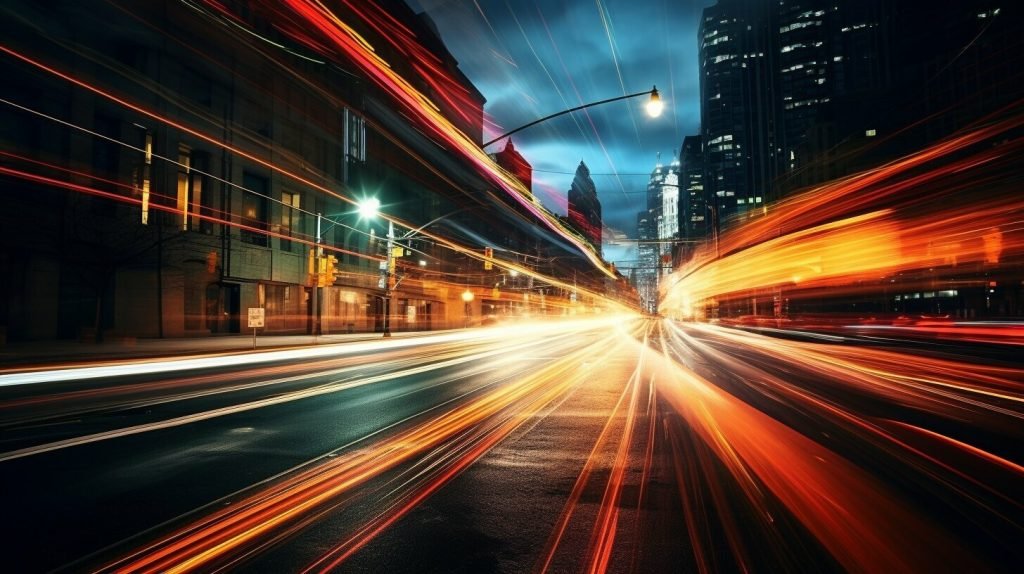
Light trails are a common subject in long-exposure photography, and for good reason. They offer a striking representation of how light moves throughout the environment around us.
To capture light trails, find a location with ample traffic. Set your camera to a slow shutter speed, usually between 10 and 30 seconds, and take the photo while keeping the camera still. The longer the exposure, the longer the light trail will be. Experiment with different shutter speeds to find the perfect balance between exposure and motion blur.
Using a tripod can help stabilize your camera and ensure a sharp image, but if you don’t have one, use any stable surface or brace yourself against a wall or tree to minimize camera shake.
Creating Motion Blur
Motion blur is another intriguing effect you can achieve with long-exposure photography. It’s a fantastic way to add a sense of movement and energy to your photos.
To capture motion blur, find a moving subject such as a waterfall or a person running. Use a slow shutter speed, usually between 1 and 5 seconds, and take the photo while the subject is moving. The longer the exposure, the more pronounced the motion blur will be.
Experiment with different shutter speeds to find the perfect balance of movement and exposure. You can also play with different camera settings such as aperture and ISO to achieve different effects.
Remember to keep your camera still or use a tripod to avoid any unwanted camera shake that can ruin the final image.
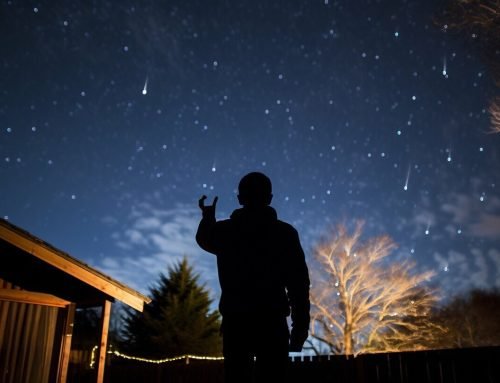
Experimenting with Capturing Movement
Long-exposure photography can help you capture the movement of almost anything, not just light and water. Experiment with capturing moving subjects like dancers, cars, or even the stars in the sky. Use a slow shutter speed and play with different camera settings to achieve the desired effect.
- Try using a slower shutter speed to create a sense of motion in still-life subjects like flowers and trees blowing in the wind.
- Use a faster shutter speed to capture stationary objects with a sense of motion, like a person jumping in mid-air or a bird in flight.
Don’t be afraid to experiment and try new things. Long-exposure photography is all about capturing the magic of movement and light in an innovative way.
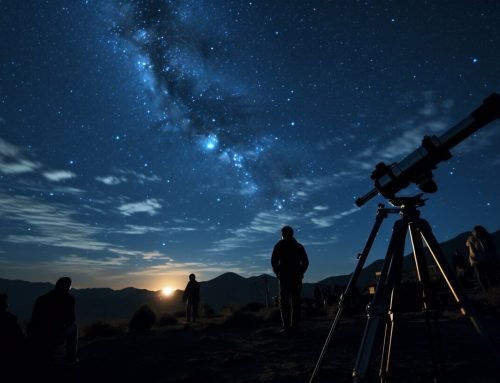
Unleashing the Power of Night Photography
Night photography is a fascinating genre that can produce truly captivating and awe-inspiring images. With long-exposure photography techniques, you can capture the magical beauty of the night sky in all its glory. Whether you’re shooting cityscapes, starry skies, or the Northern Lights, there are endless creative possibilities to explore in night photography.
Tips for Capturing Stunning Night Images
When it comes to night photography, there are a few key tips you should keep in mind for capturing stunning images:
- Use a tripod or stable surface to prevent camera shake and ensure sharp, clear images.
- Experiment with different shutter speeds to capture the desired effects in your images, such as light trails or starry skies.
- Adjust your camera’s ISO settings to balance the exposure and reduce noise in your images.
- Consider using a remote shutter release or timer to minimize camera shake when taking long exposures.
Unlocking Your Creative Potential
Night photography is not just about capturing technically sound images. It’s also an opportunity to unleash your creativity and experiment with different techniques to create truly unique and captivating images.
Here are a few creative techniques to try:
- Use light painting techniques to add a magical touch to your night images.
- Experiment with different perspectives and angles to create interesting compositions.
- Capture moving subjects such as cars or people to add a sense of motion to your images.
- Play with color by adjusting your camera’s white balance settings.
Conclusion
Night photography can be both challenging and rewarding. By mastering the techniques and tips covered in this guide, you can unleash your creative potential and capture stunning images that will leave viewers in awe. So grab your camera, head out into the night, and let your imagination run wild!
Embracing the Art of Light Painting
Light painting is a creative photography technique that involves using long-exposure photography and a handheld light source to “paint” light onto a subject, creating a unique and mesmerizing image. Whether you’re a professional photographer or a hobbyist, light painting allows you to unleash your creativity and experiment with different techniques to capture stunning images.
Tools Needed for Light Painting
Before you get started with light painting, you need to gather a few essential tools. You will need a camera that can shoot in manual mode, a tripod to keep your camera steady during long exposures, and a handheld light source like a flashlight or a sparkler. In addition, it is recommended to use a remote shutter release to avoid camera shake.
Basic Light Painting Technique
To create a light-painted image, set up your camera on a tripod and focus on your subject. Set your camera to manual mode and dial in the desired aperture, ISO, and shutter speed. Start with a shutter speed of 30 seconds or more to allow enough time for light painting. Once the camera is set up, press the shutter button and use your handheld light source to “paint” light onto your subject as the camera captures the image.
Creative Light Painting Ideas
Experiment with different light painting techniques to create unique and stunning images. Try using different colored lights, using multiple light sources, or using props like umbrellas or stencils to create interesting patterns and shapes. You can also try moving the light source around the subject in different ways or change the camera’s angle to create dynamic compositions.
Advanced Light Painting Techniques
Once you’ve mastered the basic light painting technique, you can explore more advanced techniques like steel wool spinning, where you spin a bundle of burning steel wool to create a mesmerizing effect. Another advanced technique is the use of a Pixel Stick, which is a handheld light painting tool that allows you to create intricate designs and patterns.
Tips for Successful Light Painting
- Use a tripod to keep your camera steady during long exposures.
- Experiment with different shutter speeds, apertures, and ISO settings to achieve the desired effect.
- Use a remote shutter release to avoid camera shake.
- Practice your light painting technique before attempting more advanced techniques.
- Be patient and have fun with the process!
Light painting is a fun and creative way to enhance your long-exposure photography skills. With a bit of practice and experimentation, you can create stunning and mesmerizing images that are sure to impress!
Mastering Advanced Techniques and Tips
Congratulations on your journey to becoming a long-exposure photography expert! As you continue to develop your skills, there are advanced techniques and tips that can take your images to the next level.
Experiment with Different Camera Settings
As you become more comfortable with long-exposure photography, don’t be afraid to experiment with different camera settings. Try adjusting your aperture to change the depth of field in your image. Use different ISO settings to alter the brightness and graininess of your photos. And don’t forget about white balance – tweaking this setting can help you capture the true colors of your subject.
Use Filters
Filters are a powerful tool for enhancing your long-exposure images. A neutral density filter can help you achieve longer shutter speeds, while a polarizing filter can reduce glare and increase color saturation. And don’t forget about creative filters, such as a star filter or a graduated neutral density filter.
Experiment with Creative Composition
Don’t be afraid to experiment with composition when taking long-exposure photos. Try different angles and perspectives to add interest to your images. Use leading lines to guide the viewer’s eye through the photo. And consider adding a foreground element to add depth to your image.
Capture Movement
Long-exposure photography is all about capturing movement, so don’t be afraid to play with different techniques for doing so. Whether you’re capturing light trails, waterfalls, or even people, experiment with different shutter speeds and camera settings to achieve the look you want.
Practice, Practice, Practice
As with any skill, practice is key to truly mastering long-exposure photography. Keep experimenting with different techniques and subjects, and don’t be afraid to make mistakes. With time and persistence, you’ll develop your skills and capture breathtaking images that you’ll be proud to share with the world.
Conclusion
Congratulations! You have now reached the end of this comprehensive guide to long-exposure photography. We hope that you have learned a great deal about the art of capturing mesmerizing and captivating images using long-exposure techniques. Remember, the key to mastering this technique is to experiment with different camera settings, such as aperture, ISO, and shutter speed, to achieve the desired effects.
By mastering the art of long-exposure photography, you can unlock your full creative potential and capture stunning images that will leave your viewers in awe. Remember, it takes time and practice to perfect your skills, so don’t be afraid to experiment and try new things.
Whether you’re capturing the beauty of the night sky, creating stunning light trails, or painting with light, long-exposure photography is a powerful tool that can take your photography skills to the next level. So, grab your camera, head out into the world, and start capturing the magic of long-exposure photography today!
FAQ
What is long-exposure photography?
Long-exposure photography is a technique that involves using a slow shutter speed to capture stationary objects while also capturing the movement of any subjects in the frame. It allows for the creation of unique and mesmerizing images by showing the passage of time in a single shot.
How do I set up my camera for long-exposure photography?
To set up your camera for long-exposure photography, you will need to adjust your camera settings. Start by selecting a low ISO setting to minimize noise in your images. Then, set your camera to manual mode and choose a slow shutter speed. Finally, use a tripod or stable surface to keep your camera steady during the longer exposure.
How does long-exposure photography enhance night photography?
Long-exposure photography is particularly effective for night photography because it allows for the capture of light over an extended period of time. This means that you can capture the movement of stars, light trails from cars, and other sources of light in the scene, resulting in stunning and dramatic images.
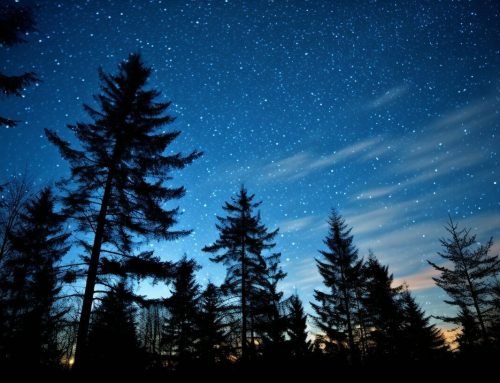
What are some popular subjects for long-exposure photography?
Popular subjects for long-exposure photography include light trails from cars, waterfalls, starry skies, cityscapes, and the Northern Lights. These subjects offer opportunities to capture movement and create beautiful and dynamic images.
How can I create light trails and motion blur in my long-exposure photographs?
To create light trails and motion blur in your long-exposure photographs, find a subject that is in motion, such as cars or people. Set your camera to a slow shutter speed and keep it steady on a tripod. As the subject moves through the frame during the exposure, it will create a trail or blur, adding a sense of motion to the image.
What is light painting in long-exposure photography?
Light painting is a technique in long-exposure photography where you use a light source to “paint” or create patterns in the frame while the shutter is open. By moving the light source around, you can create unique and creative images with streaks of light or illuminated objects.
What are some advanced techniques I can try in long-exposure photography?
Some advanced techniques you can try in long-exposure photography include using neutral density filters to further extend the exposure time, experimenting with different compositions and angles, and incorporating multiple exposures or blending techniques in post-processing to create composite images with enhanced effects.