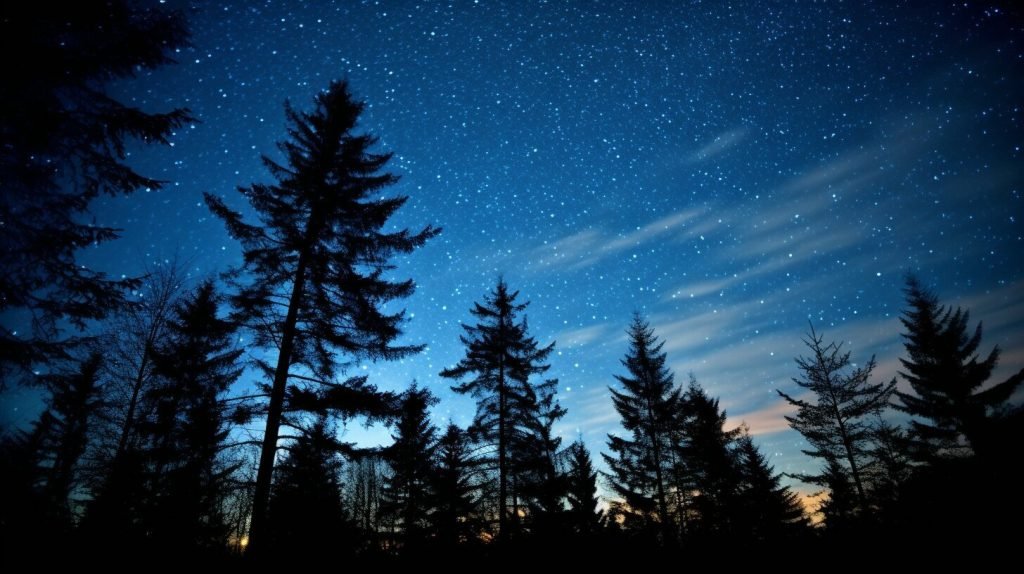
Are you fascinated by astrophotography and the magic of the night sky? Do you dream of capturing stunning images of the Milky Way galaxy? If so, you’re in the right place. In this article, we’ll explore the world of milky way photography and provide you with valuable tips to elevate your night sky photography game.
Whether you’re new to astrophotography or an experienced photographer looking to enhance your skills, the tips in this article will help you unleash your creativity and capture breathtaking starry galaxies.
Key Takeaways:
- Understand the basics of Milky Way photography and astrophotography techniques.
- Master essential tips for selecting the right equipment, location, exposure settings and composition.
- Learn techniques and best practices for photographing stars and creating stunning star trails.
- Experiment with different settings and composition to unleash your creativity.
- Enjoy the wonders of Milky Way photography and explore the night sky.
Understanding Milky Way Photography
Before you can capture the Milky Way, it’s important to understand the techniques involved in astrophotography. Capturing the Milky Way requires a different approach than other types of photography. Here are some astrophotography techniques that can help you achieve impressive results:
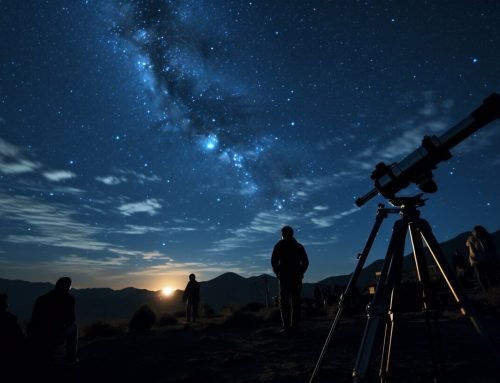
Using the Right Equipment
The key to capturing the Milky Way is having the right equipment. You will need a camera with manual controls, a wide-angle lens with a low f-stop (preferably 2.8 or lower), and a sturdy tripod. A remote release or timer can also be helpful to prevent camera shake.
Location Matters
Choosing the right location is crucial for capturing the Milky Way. You’ll want to find a location away from light pollution with an unobstructed view of the night sky. Websites like Dark Sky Finder can help you find the perfect location.
Exposure Settings
When it comes to exposure settings, start with the 500 rule. Divide 500 by your lens focal length to get the maximum exposure time without the stars trailing. For example, if you have a 24mm lens, your maximum exposure time would be 20 seconds (500 ÷ 24 = 20.8). You’ll also want to shoot in manual mode, with a wide open aperture and a high ISO (usually around 3200-6400) to capture enough light.
Composition
Composition is key to capturing stunning Milky Way photos. Consider incorporating foreground elements like trees or mountains to add depth and interest to your images. You can also experiment with different angles and perspectives to create unique and visually appealing shots.
By understanding these techniques and settings, you’ll be on your way to capturing stunning shots of the Milky Way.
Essential Milky Way Photography Tips
Now that you’re familiar with the basics of Milky Way photography, it’s time to take your skills to the next level and capture stunning starry galaxies. To help you do this, we’ve compiled a list of essential Milky Way photography tips that you should keep in mind before your next astrophotography expedition.
Tip 1: Choose the Right Equipment
Having the right equipment is crucial for capturing impressive astro-images. To photograph the Milky Way, you’ll need a camera with manual mode, high ISO capabilities, and a wide-angle lens. A sturdy tripod, remote shutter release, and headlamp or flashlight are also essential to keep your camera steady and navigate at night.
Tip 2: Find Dark Skies
Light pollution can ruin Milky Way shots, so it’s important to find a location with dark skies for the best results. Use Dark Sky Finder or a similar app to locate nearby dark spots, and plan your shoot accordingly.
Tip 3: Master Exposure Settings
Exposure settings are crucial for capturing the Milky Way’s subtle details and colors. For starters, set your camera to manual mode, the widest aperture, a high ISO (1600-3200), and a shutter speed of 20-30 seconds. Experiment with different exposure settings to achieve the best results.
Tip 4: Get Creative with Composition
Composition can make or break a Milky Way photo. Instead of centering the Milky Way, try incorporating foreground elements such as trees, mountains, or buildings to add depth and interest. Also, consider using the rule of thirds, leading lines, and other composition techniques to enhance the visual impact of your photos.
Tip 5: Practice Patience and Perseverance
Milky Way photography takes time, patience, and perseverance. Don’t get discouraged if you don’t get the perfect shot on your first try. Keep practicing, experimenting, and learning from your mistakes. With perseverance, you’ll soon be capturing stunning starry galaxies like a pro.
Mastering Night Sky Photography
Photographing stars is not only about pointing your camera towards the sky. As the Earth rotates, the stars appear to move, and capturing their motion requires specialized techniques. Here are some essential tips to help you master night sky photography.
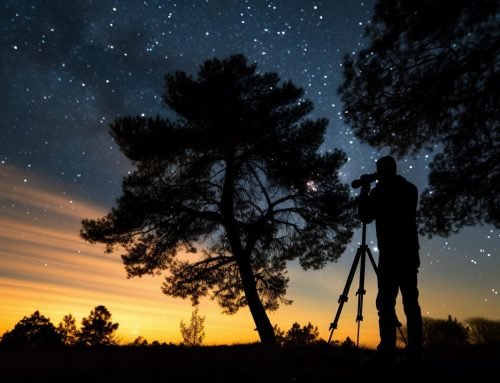
Focusing on the Stars
Focusing on the stars can be challenging, especially in low light conditions. However, manual focus is essential for sharp images. The best approach is to set your lens to manual focus and use the live view mode on your camera to zoom in on a bright star. Adjust the focus until the star appears as a pinpoint. Once you have the focus set, you can compose your shot and start shooting.
Reducing Noise
Noise can be a major issue in low light conditions, and it can ruin a perfectly good photo. To reduce noise, use the lowest ISO setting possible and the widest aperture your lens allows. This will allow more light into the camera and reduce the need for a longer exposure. Additionally, use long exposure noise reduction to eliminate any remaining noise.
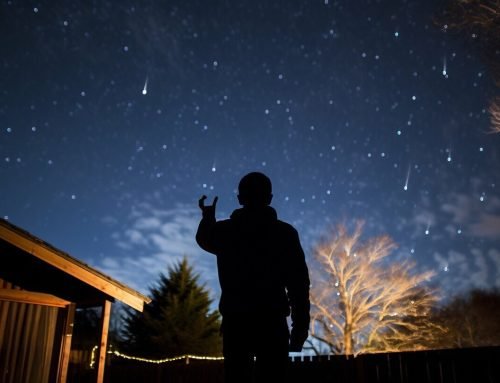
Creating Star Trails
Star trails are a popular type of night sky photography that captures the movement of the stars over time. To create star trails, use a wide-angle lens and set your camera to Bulb mode. Use a remote shutter release to keep the shutter open for an extended period, typically between 15 and 30 minutes. During this time, the stars will appear to move across the sky, creating beautiful trails. Make sure your camera is stable during the exposure to avoid any camera shake.
Getting Creative
Night sky photography offers endless opportunities for creativity. Experiment with different compositions, use foreground elements to add depth to your images, and try different colors for light painting. Don’t be afraid to break the rules and try something new.
With these tips, you’re ready to master night sky photography and capture stunning images of the stars. Remember to be patient and persistent and keep practicing until you get the perfect shot. Happy shooting!
Conclusion
Congratulations on learning valuable tips and techniques to unleash your creativity in milky way photography. By applying these insights and experimenting with different settings and composition, you’ll be able to capture stunning starry galaxies and leave everyone star-struck with your astro-images. Keep exploring the night sky and enjoy the wonders of Milky Way photography!
Remember, capturing starry galaxies and photographing stars are not just about technical skills, but also about your creativity and imagination. Don’t be afraid to experiment and try new things. Look for inspiration and ideas from other photographers, but also develop your unique style and vision.
Lastly, don’t forget to have fun and enjoy the process of capturing the beauty of the night sky. Milky Way photography is a journey of discovery and wonder, so take your time, be patient, and embrace the magic of the cosmos through your lens.
FAQ
What equipment do I need for Milky Way photography?
To capture stunning images of the Milky Way, you’ll need a DSLR or mirrorless camera with manual settings, a wide-angle lens with a low aperture (preferably f/2.8 or lower), a sturdy tripod, and a remote shutter release.
What is the best location for Milky Way photography?
The best locations for Milky Way photography are areas with minimal light pollution and clear, dark skies. National parks, remote countryside, or high altitudes are ideal for capturing the brilliance of the galaxy.
What settings should I use for Milky Way photography?
When capturing the Milky Way, it’s crucial to use a wide aperture (e.g., f/2.8), a high ISO (e.g., ISO 3200 or higher), and a long exposure time (e.g., 15-30 seconds) to gather enough light. Experiment with these settings to achieve the desired results.
How do I focus correctly for Milky Way photography?
To achieve sharp focus on the Milky Way, switch your lens to manual focus mode, set your focus to infinity (∞), and use the live view mode to zoom in and fine-tune the focus manually on a bright star or distant light source.
How can I reduce noise in my Milky Way photos?
To reduce noise in Milky Way photos, use a lower ISO setting if possible, take multiple exposures and stack them using software, or apply noise reduction tools during post-processing. Noise reduction can help enhance the details and clarity of the stars.
What composition techniques work well for Milky Way photography?
When composing your Milky Way shots, look for interesting foreground elements such as trees, mountains, or water bodies to add depth and visual appeal to your images. Incorporating leading lines or framing the galaxy with natural or man-made objects can also create a visually compelling composition.
How can I create stunning star trails in my Milky Way photos?
To create star trails in your Milky Way photos, use a longer exposure time (e.g., several minutes to an hour) and ensure stability by using a locked tripod. Experiment with different exposure times and stacking techniques to achieve mesmerizing star trail effects.
Can I capture the Milky Way with a smartphone?
While smartphone cameras have improved over the years, capturing the Milky Way in all its glory is challenging. Dedicated cameras with manual settings and the ability to use wide-angle lenses with low apertures will yield better results. However, some smartphone apps and lenses can help you capture basic shots of the Milky Way.