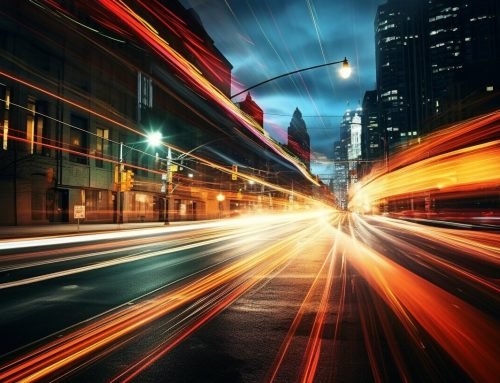
Welcome to the fascinating world of night sky photography! Capturing the beauty of the night sky can be an awe-inspiring experience as you witness the stars, galaxies, and cosmic wonders above us. Whether you’re a beginner or have some experience, this beginner’s guide will provide you with the knowledge and techniques to capture stunning images of the night sky.
Photographing the night sky can be challenging, but with the right gear, techniques, and location, you can take extraordinary photos that will leave you with a sense of wonder and amazement.
Key Takeaways
- Capturing the night sky is an exciting and rewarding experience.
- With the right gear and techniques, you can capture stunning images of the night sky.
- Choosing the right location is essential for successful night sky photography.
- Post-processing can enhance your night sky photos and take them to the next level.
- Practice and experimentation are key to improving your skills in night sky photography.
Understanding Night Sky Photography
Before you dive into the technical aspects of night sky photography, it’s important to understand the basics. Astrophotography, night sky images, and star photography are all forms of capturing the night sky. Each type involves unique techniques and settings to capture the perfect shot.
Astrophotography
Astrophotography is the art of capturing celestial objects such as stars, planets, and galaxies. It requires a high level of technical skill and precision. To capture astrophotography images, you’ll need to use specialized equipment such as telescopes, mounts, and motorized tracking systems.
Night Sky Images
Night sky images capture the beauty and mystery of the night sky. This type of photography captures the night sky as it appears to the naked eye. You’ll need a camera with manual settings to adjust the exposure, shutter speed, and ISO to capture the perfect shot.
Star Photography
Star photography is a form of night sky photography that specifically focuses on capturing the stars. It requires a camera with manual settings, a wide-angle lens, and a tripod to keep the camera steady during long exposures. The key to capturing stunning star images is to use low aperture settings, long exposures, and minimal noise reduction to create a clear and vibrant image.
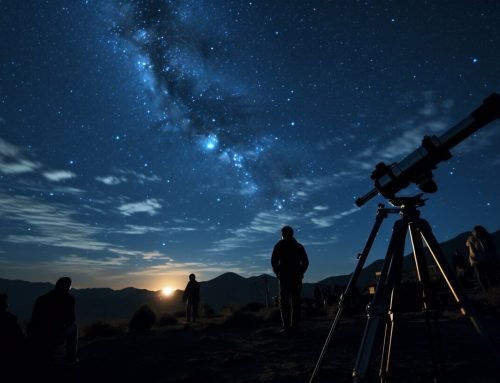
Essential Gear for Night Sky Photography
Good gear is essential for capturing stunning night sky photos. Here are the must-have items:
Camera
The camera is the most important piece of equipment for night sky photography. Choose a camera that can shoot in manual mode, has good low-light performance, and produces raw files. Full-frame cameras are ideal, but crop-sensor cameras can also work well.
Lens
Invest in a wide-angle lens with a large aperture, such as f/2.8 or wider. A 14-24mm or 16-35mm lens is ideal for capturing the night sky.
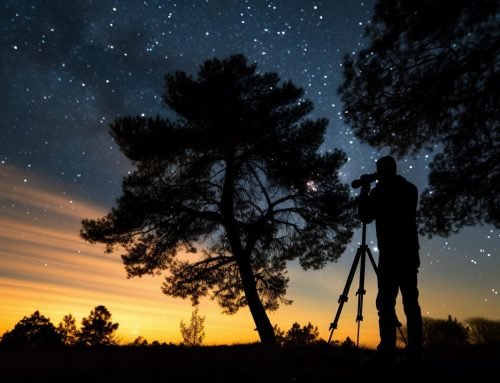
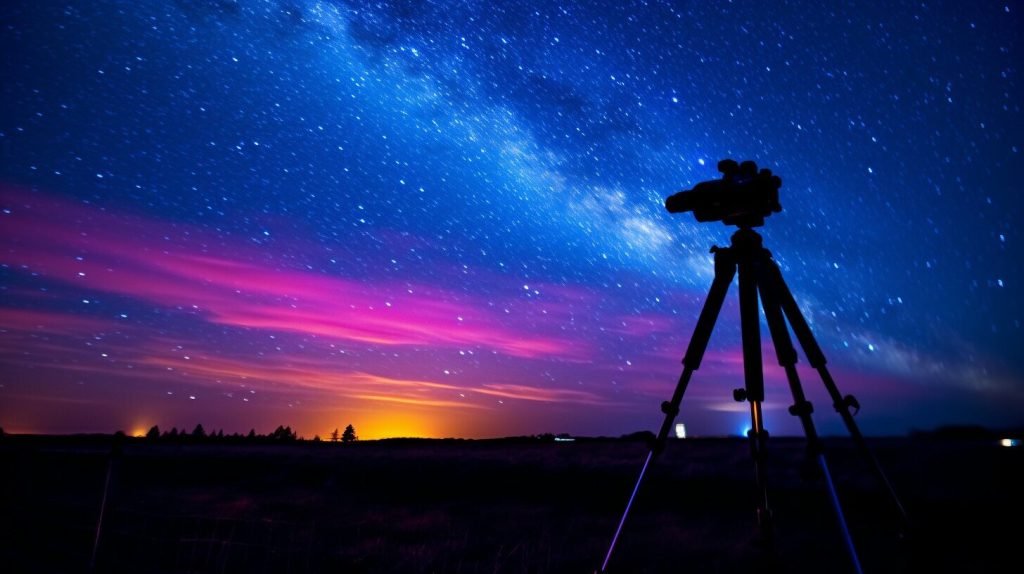
Tripod
A sturdy tripod is essential for keeping your camera steady during long exposures. Look for a tripod that is stable and can hold the weight of your camera and lens.
Remote Shutter Release
A remote shutter release allows you to trigger the camera without touching it, reducing the risk of camera shake. A wired or wireless remote shutter release will both work, but make sure it’s compatible with your camera model.
Headlamp
A headlamp is necessary for navigating in the dark and adjusting camera settings. Choose a headlamp with a red light option to avoid disturbing your night vision.
Extra Batteries and Memory Cards
Bring extra batteries and memory cards with you to ensure you don’t run out of power or space during your shoot.
With this essential gear, you’re ready to embark on your night sky photography adventure and capture breathtaking images of the stars above.
Techniques for Capturing the Night Sky
Now that you have the necessary gear, it’s time to learn the techniques that will help you capture stunning night sky photos. Here are some tips:
Shoot in Manual Mode
Shooting in manual mode is crucial for night sky photography. Set your aperture to its widest opening, typically between f/1.4 and f/2.8, to let in as much light as possible. Use a high ISO, such as 3200 or 6400, to capture details in dimly lit conditions.
Control Exposure
Controlling exposure is key to capturing balanced night sky photos. Take test shots and adjust your shutter speed to achieve the desired exposure. Keep in mind that longer shutter speeds will produce brighter images, but may also introduce unwanted noise.
Use Long Exposures
Long exposures are ideal for capturing the night sky’s movement. Experiment with different exposure times, starting with 15-30 seconds, and adjust accordingly. Use a remote shutter release or the camera’s self-timer function to prevent camera shake and ensure sharp, clear images.
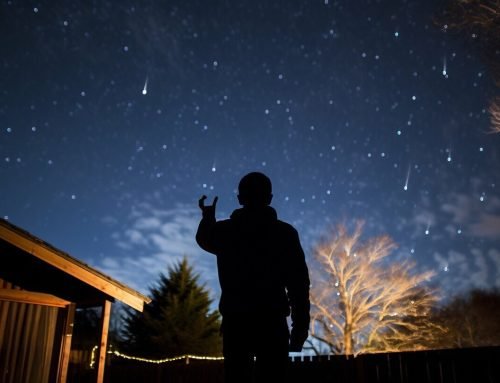
Experiment with Light Painting
Light painting involves using a flashlight or other light source to illuminate the foreground of your photo. This technique can add depth and interest to your night sky photos, creating a unique and captivating image.
Try Stacking
Stacking involves combining multiple photos of the same scene to produce a single, high-quality image. This technique can reduce noise and improve overall image quality, making it a popular choice for night sky photography.
Now that you have the knowledge and techniques, it’s time to get out there and capture the magic of the night sky. Remember to experiment, try new techniques, and most importantly, have fun!
Finding the Perfect Location
When it comes to capturing stunning Milky Way photography and other celestial phenomena, location is everything.
You’ll want to find a spot that’s far away from light pollution to reduce the glare and allow the stars to shine brighter.
One helpful tool for finding the perfect location is astronomy apps like SkyView or Star Walk. These apps can help you locate the Milky Way and other celestial objects, and plan your shoot accordingly.
It’s also essential to consider the weather conditions, such as cloud cover and wind. Make sure to check the forecast before heading out, and avoid shooting on windy nights to prevent camera shake.
Finally, don’t forget about safety. When venturing out at night, make sure to bring adequate lighting, clothing, and any necessary supplies like food and water.
Night Sky Photo Tips
- Shoot during the new moon phase, as the sky will be darker and the stars will appear brighter
- Use a wide-angle lens with a low f-stop to capture as much of the sky as possible and let in more light
- Experiment with different shutter speeds, ranging from 15 seconds to a few minutes, to find the perfect exposure
- Consider using a remote release or self-timer to prevent camera shake
- Don’t be afraid to move around and try different angles to capture unique and interesting compositions
With these tips and a bit of planning, you’ll be well on your way to capturing breathtaking Milky Way photography and other celestial wonders of the night sky.
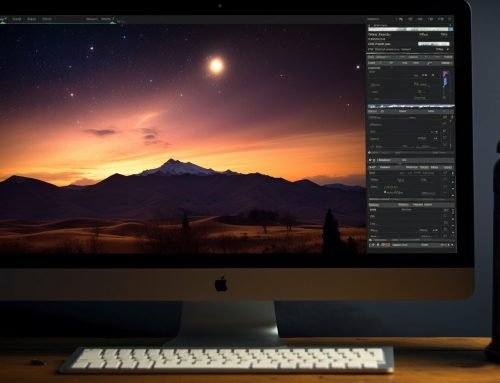
Editing and Enhancing Night Sky Photos
Congratulations on capturing some stunning night sky photos! Now, let’s take them one step further with editing. Post-processing can significantly enhance your images and make them stand out. Here are some tips and techniques to help you elevate your night sky photos:
Adjust Exposure
One of the essential steps in editing is adjusting the exposure. Night sky photos often require longer exposures, which can result in overexposure or underexposure due to the brightness of the stars and Milky Way. Use the exposure slider in your editing software to adjust the brightness of your photos. Be careful not to overdo it, as it can make your photos look unrealistic.
Color Correction
Color correction is another crucial step in editing night sky photos. The colors of the night sky can vary depending on many factors, such as light pollution, moonlight, and the time of year. You can adjust the color temperature and tint sliders to fine-tune the overall color cast of the image. It’s best to experiment with different settings until you achieve the desired result.
Noise Reduction
Noise is a common issue with night sky photos, resulting from using high ISO settings in low light conditions. In post-processing, you can use noise reduction tools to reduce graininess in your photos. Be mindful not to overdo it, as it can result in a loss of detail and sharpness.
Add Special Effects
Adding special effects can give your night sky photos a unique and creative touch. You can experiment with adding stars, galaxies, and nebula overlays to make your photos more visually stunning. However, be careful not to overdo it, as it can take away from the natural beauty of the night sky.
Conclusion
Editing and enhancing your night sky photos can take them to the next level and make them truly mesmerizing. Use these tips and techniques to experiment with different editing styles and techniques. Don’t be afraid to try new things and be creative. Remember to always start with a high-quality photo and make subtle adjustments to achieve the desired result. Happy editing!
Conclusion
In conclusion, night sky photography may seem daunting at first, but with the right techniques, gear, and location, you can capture stunning images of the night sky. Remember to always experiment and practice with different settings and post-processing techniques to improve your skills.
Night sky photography is all about patience, persistence, and creativity. You never know what magical moments the night sky may offer, whether it’s the Milky Way, shooting stars, or a magnificent meteor shower.
Keep Exploring and Capturing the Beauty of the Night Sky
We hope this beginner’s guide has inspired you to venture out and capture the captivating beauty of the night sky. Don’t forget to share your work with others and continue exploring new techniques.
Remember, the night sky is always changing, so keep an eye out for new opportunities to capture breathtaking images. With practice, dedication, and a passion for photography, you can master the art of night sky photography and create your own stunning images of the cosmos.
So, grab your gear, pack your patience and head out into the night to explore the wonders of the skies. Happy shooting!
FAQ
Can I capture the night sky with a smartphone camera?
While smartphone cameras have improved over the years, capturing detailed night sky images may be challenging due to their limited capabilities. For optimal results, we recommend using a DSLR or mirrorless camera with manual settings and interchangeable lenses.
What is the best time to photograph the night sky?
The best time for night sky photography is during the “golden hour,” which is typically the period right after sunset or right before sunrise. This is when the sky is darkest, allowing the stars and celestial objects to stand out. However, certain phenomena like the Milky Way are best captured during specific months or seasons.
How long should my exposures be for night sky photography?
The length of your exposures will depend on various factors, including the focal length of your lens and the desired effect. As a general guideline, starting with exposures around 15-30 seconds can capture the stars’ movement while avoiding excessive blurring. Experimentation is key to finding the perfect balance for your desired results.
What lens should I use for night sky photography?
A wide-angle lens with a low aperture (f/2.8 or lower) is ideal for capturing the vast expanse of the night sky. It allows more light to enter the camera and provides a wider field of view, making it easier to include the stars, Milky Way, and other celestial objects in your frame.
How can I reduce noise in my night sky photos?
Noise is a common challenge in low-light photography. To reduce noise, try shooting at a lower ISO setting, using longer exposures, and utilizing noise reduction techniques during post-processing. Additionally, using a camera with good high ISO performance and noise reduction capabilities can greatly improve the overall image quality.
Do I need a tripod for night sky photography?
Yes, a sturdy tripod is crucial for night sky photography. Since you’ll be using longer exposures to capture the faint light of the stars, any camera movement can result in blurry images. A tripod provides stability and ensures sharp, well-focused photos.
What apps can I use to find the best locations for night sky photography?
There are several apps available that can help you find dark sky locations and plan your night sky photography shoots. Popular options include Dark Sky Finder, PhotoPills, and Star Walk. These apps provide information on light pollution levels, moon phases, and the location of celestial objects, assisting you in selecting the perfect shooting spots.